With the purchase of a walk-behind tractor, there was a need for a cargo trailer for it, for garbage collection, transportation of firewood, building materials and other household needs. Looking at the factory-made trolleys in the store and listening to the reviews of the owners, I realized that for a decent price, manufacturers offer, to put it mildly, very low quality products. The main complaints were about the fragility of the whole structure, a weak, often breaking hitch, and rather weak brakes and wheels. There were also complaints about peeling paint and rust after the first year of operation. It was decided to make a trailer myself, for the Salyut 100 walk-behind tractor.

Wheels - choose the right ones
The first step was to choose the wheels for the trailer. At first I wanted to use the rear beam assembly with wheels from the VAZ 2109, but having estimated its considerable weight and dimensions of the future trailer, I changed my mind. For my Salyut 100, such a trailer would be too heavy. Nothing but wheelbarrow wheels were available in stores. The only suitable wheels that could easily withstand the load were the wheels from the little Oka VAZ-2111.

To begin with, I bought two used wheels with good summer tires. As brakes, it was decided to use the rear brakes from the Oka assembly, which I purchased along with the rear axles and brake drums, which were also in use. I bought two new handbrake cables, also from Oka, in a car shop.
Body and frame
The body and all other structural elements are made of shaped pipes, which were purchased at the nearest construction market. First, I made two side walls of the body from a pipe with a section of 20x30 mm and a wall thickness of 2 mm.
Drawing of the side and rear side of the trailer

Two pipes 120 cm long and two pipes 31 cm long. I cut the ends of the pipes with a grinder, as shown in the diagram above, at 45 degrees, and placing them on a sheet of furniture chipboard, I made tack welding (three electrodes) in several places. The squareness of the connection was checked with an ordinary construction square. The resulting blanks, after checking their straightness, finally boiled, and so that they would not be led during the welding process, pressed them with clamps.
The welding seams were polished with the same grinder. For convenience, I used an angle grinder with a disk with a diameter of 125mm.
Then from the same pipe (20x30mm) I cut five blanks exactly 1 meter long. These are blanks for the bottom and front side of the bogie. I welded them between the two side boards, at first also slightly grabbing them with welding, pressing them with clamps to chipboard sheet. Right angles also controlled with the same building square. The two central pipes, indicated in the figure by red arrows at numbers 3 and 4, were placed not vertically like the rest, but horizontally and made spacers (1 and 2) aligned them along the lower plane of the bottom. On the side and front sides, I also made spacers from the same pipes.


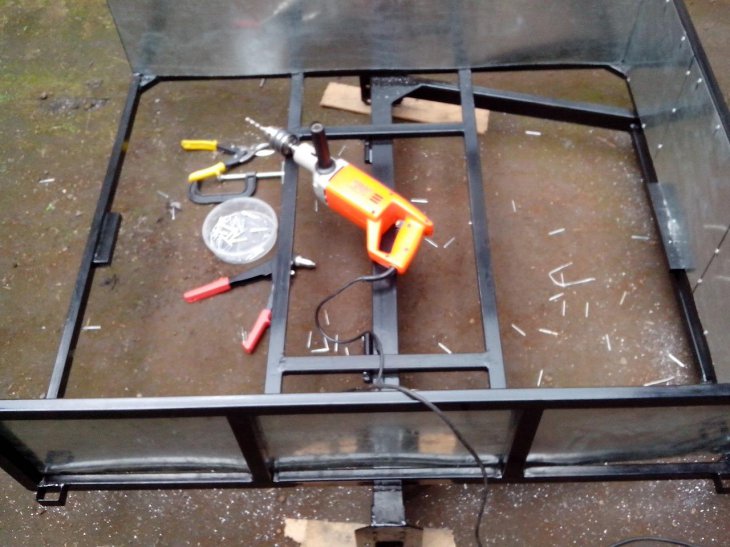
To fix the bottom, I welded it in the corners of the body and in the center of the pipe trimming, they can be seen in the photo. The rear board was made similarly to the side boards from the same pipes 20x30mm, only the dimensions were removed in place, it turned out 990x270mm.


The tailgate of the trailer is mounted on ordinary door hinges and closed with latches; for safety, reflective stickers are glued to it, which are clearly visible at night. For convenience, the board is made removable, allowing you to quickly unload the transported cargo.


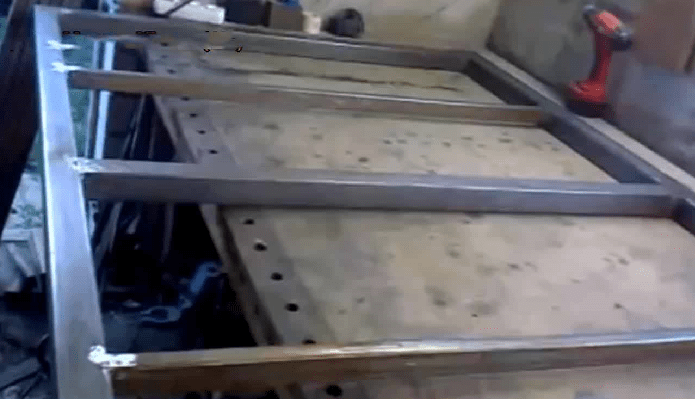
On the side and front boards, I welded pipe trimmings 25x40mm for racks of additional wooden boards (see photo below).

I did not make the length of the body longer, since when it is raised, the angle will be too small, and the contents will not fall out of it. The body frame is ready, let's move on to the trailer frame.
Frame
The beam was made from prof. pipes 50x50mm 1180mm long by welding pieces of the same pipe 155mm long at 45 degrees, as shown in the figure. Then I welded two pieces of a 32 mm corner from the sides, parallel to the plane of the cut pipes. The axles of the trailer are attached to these corners with bolts.


This design is due to the fact that turning work is not available to me. In the presence of lathe it is possible to significantly simplify the design by turning the necessary blanks for attaching the axles and simply welding them to the trailer beam.
Next, I made the drawbar of the trailer. It needs two profile pipes 25x50mm and 1.85 meters long each. I welded these pipes to the beam, resulting in a triangular structure, to reinforce which I welded 4 mm thick metal scarves in the corners next to the beam, and welded an 8 mm thick plate in front under the towing device. In order for the trailer to become tipper, a drop of door hinges bought in the store was welded to the beam and bottom struts (in the photo they are shown by arrows 1 and 2).
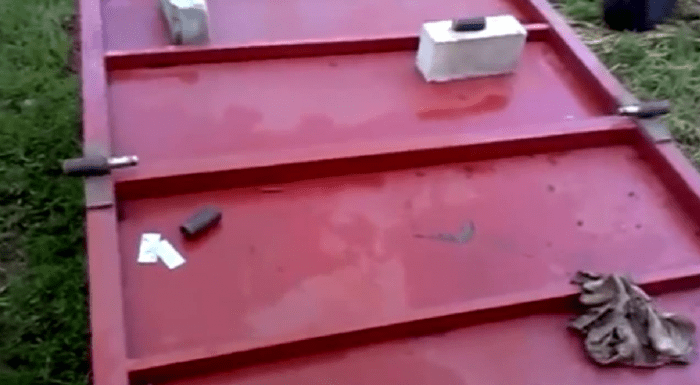
The body is fixed door latch welded to the spacer between the drawbar pipes (see photo below).


The latch is inserted into a piece of pipe and welded, so it holds quite firmly. It opens with a lever on the toolbox, connected to the latch with an ordinary wire.
Seat - toolbox
All metal parts are painted with black primer - rust enamel, and the body and tool box are sheathed with galvanized roofing iron, which is planted on ordinary rivets. The frame of the tool box is welded from a 20 mm angle and has dimensions: L 70 x W 34 x H 30 cm. The seat is made of a piece of chipboard and foam rubber, sheathed with leatherette. A lock is embedded on the side (see photo).


The dimensions of this box were not chosen by chance, because there is a need to transport a chainsaw, an ax and a canister of gasoline. And as it turned out later, the long seat is more comfortable when cornering. The bottom of the trailer was made from two pieces of waterproof OSB 12mm thick. Subsequently, I will fasten a sheet of galvanized roofing from above.
Brake system
The braking system is standard from the Oka. The parking brake is used. The brake pedal is welded from 6mm metal. It is fixed on a footrest (30x60cm), this plate was found in a landfill. Under it are welded two corners of 32mm and a length of 37cm. A pedal is attached to them in front, and a plate with two holes for brake cables is attached to the back. The ends of the cables are screwed with special clamps to T shaped plate, from which there is a thrust to the brake pedal. There is nothing complicated in the design of the brakes, I think everything will be clear from the photos.


hitch
As a hitch for the device, I made and used a trailer assembly (PIR) to the MB from Yuri Rybalchenko. For which many thanks to him! His device can be easily found on the Internet by typing the highlighted phrase in a search engine. So that when towing a trailer, the hitch of the walk-behind tractor does not break, I made an intermediate bracket, twisting it with bolts with a ready-made (in red photo) bracket from the hitch for attachments.

I also had to make a homemade trailer pin from a suitable metal bar.

Summing up, I can say that the design of the trailer turned out to be quite durable and comfortable. Exploiting almost three months, I have not identified any shortcomings. In no way inferior to factory-made trailers, at a price it cost almost three times cheaper, because it bought used spare parts. It took about two weeks to build and search for spare parts. Well, since this is my first experience as a welder, I ask you not to judge strictly. I will be glad if my design will be useful to someone.
- We express our gratitude to the user for the informative and useful material.
In the garden or in the garden, a walk-behind tractor is one of the most useful things. With its help, you not only easily cultivate the land, but also transport a lot of necessary things: hay, fertilizers, potato crops, fuel ... But how can this be done if a standard walk-behind tractor does not have a trailer? There is a way out - a do-it-yourself cart for a walk-behind tractor is made (the drawings are given below) quite simply, and this will save a lot of money.
A simple do-it-yourself cart for a walk-behind tractor drawings
A trolley for a walk-behind tractor can carry a load of 400-450 kg plus the weight of the driver. She easily carries six or seven sacks of potatoes without reloading.
Drawing of a trolley for a walk-behind tractor
Description:
- 1 - bracket for attachments of a walk-behind tractor;
- 2 - console;
- 3 - carrier;
- 4 - footboard from the board s20;
- 5 - driver's seat from the board s20;
- 6 - frame;
- 7 - body from the board s20;
- 8 - support beam from a bar 50 × 50, 3 pcs.;
- 9 - bolt M8;
- 10 - thrust ring made of pipe st.58×4;
- 11 - a wheel from a motorized carriage, 2 pcs.

Carriage carrier structurally contains only a few parts, fastened together by welding. The most overloaded part will be the tongue-to-swivel interface. Therefore, in this place it is necessary to install additional stiffeners.

Trolley frame
It is made of a steel corner and scraps of pipes with a round and rectangular section. The whole structure looks somewhat intricate and has an excess margin of safety. It is designed for use on rough terrain and hence harsh operating conditions for the trolley.
Trolley frame for walk-behind tractor

- 1 - brace from the corner of st. L21 × 3;
- 2 - seat frame from the corner of st. L21 × 3;
- 3 - riser from a pipe st.50 × 25 × 4;
- 4 - seat posts from the corner st. L40 × 4;
- 5.14 - front struts from the pipe st.50 × 25;
- 6, 15 - longitudinal spars from the corner of st. L40 × 4;
- 7, 8 - wheel axle supports from the corner of st.L32×4;
- 9.16 - rear struts from the pipe st.50 × 25;
- 10 - reinforcing cross member from the corner of st. L40×4;
- 11 - longitudinal hinge body made of pipe st.58×4;
- 12 - wheel axle from a circle st.30 mm;
- 13.17 - transverse spars from the corner of st. L40 × 4;
- 18 - scarves (s4).
Who does not count on such large loads can take a simpler option.
trolley carrier

- 1 - housing of the swivel unit;
- 2 - drawbar from the pipe st. 49×3, L1820;
- 3 - frame of the footrest of the corner of st. L25 × 4;
- 4 - stop from pipe st.58×4;
- 5 - stiffener from sheet st.s4;
- 6 - overlay from a strip. 25 × 4.
The blank for the wheel axle is a steel circle with a diameter of 30 mm. With an axle length of about a meter, the wheels are under the body. The wheel axle with angular bearings and a gusset is welded to the spars and the body of the longitudinal hinge.
Body
It is knocked together from 20mm boards, on the corners of which steel corners are attached. The bogie body is attached to the frame through three strong support beams made of 50x50 timber.

wheels
They are taken from the motorized stroller together with the hub assembly. Both ends of the axle are sharpened to match the diameter of the hub bearings.
Hitch with walk-behind tractor
The coupling of the trolley and walk-behind tractor is provided by the console. Top part it repeats the contour of the holder of the hiller, as it is fixed in the standard bracket of attachments of the walk-behind tractor. Around the lower part in the form of an axis, a rotary carrier assembly is fixed in two RUE-bearings. The space between RUPs is filled with grease and closed from the outside with anthers.
Under severe operating conditions of the trolley, its connection and the carrier must be articulated.
The drawbar is inserted inside the tubular body of the longitudinal hinge, it is fixed with a thrust ring. This design leads to the independence of the wheels of the cart from the wheels of the walk-behind tractor, which, when driving over bumps, greatly simplifies the control of the walk-behind tractor.
Knot swivel

1 - console,
2 - anthers,
3.6 - bearings 36206,
4 - body,
5 - spacer sleeve,
7 - remote bushing,
8 - washer,
9 - nut М20×2.5,
10 - oiler,
11 - drawbar.
The driver sits on a semi-rigid wooden seat cushion in front of the body. The driver's hands hold on to the levers of the walk-behind tractor, and with his feet he leans on the step made of wood in a frame from the corners on the drawbar.
Do-it-yourself trolley for a walk-behind tractor
The simplest trolley for a walk-behind tractor can easily carry loads weighing up to 400 kg.
Structural parts of the bogie
In any bogie, the following components can be conditionally distinguished: a driver's seat mounted on a welded frame, a central frame, the bogie itself with a body and wheels.
What material is the frame of the trolley made of?
The easiest way is to cook it from a channel and a corner, which you can buy at any store. building materials. The frame is welded with the utmost care, as it must withstand the stress of driving over bumpy country roads.

Blank for wheel axle
For it, you can take a steel circle with a diameter of at least 30 mm. The axis is connected by welding with a longitudinal hinge and with corner supports. It is necessary to select the length of the axle so that the wheels are under the body.
How to make a trolley body
With your own hands, the body is most easily assembled from boards up to 20 mm thick, steel corners are installed at its corners. The boards are bolted to the frame. It is better to make the sides folding: it will be more convenient to unload large volumes of goods.
wheels

You can use them from any agricultural machinery. Wheels from a conventional sidecar from a motorcycle are quite suitable. The axle will need to be turned to fit the diameter of the bearings in the wheel hubs.
trailer hitch
It is made from any suitable piece of metal by drilling a hole in it in which the hitch can easily pass. It is desirable to make a swivel assembly from a bearing with a suitable diameter, fixing it as firmly as possible by welding.
Cart bottom
Of course it can be made from edged board. But a more durable bottom is best made from sheet metal with a preferred sheet thickness of two to three millimeters. Such a cart for a walk-behind tractor, which you yourself can make in two or three days, can last for several years and with little or no repair.
Do-it-yourself trolley for a walk-behind tractor video selection
The use of a trailer for a walk-behind tractor allows you to significantly expand the functionality of this popular technical tool. However, the purchase of a finished device is not financially feasible for all homeowners. In such a situation, you can think about making a trailer with your own hands.
Types and features of structures
Trailers have different carrying capacities, and this is one of the criteria used in their classification. Most often, at home, there is no need to use devices with a high load capacity. Besides, all trailers for walk-behind tractors can be divided into groups according to their design:
- Whole - have the simplest design, in which the bottom and walls are connected motionlessly.
- With folding sides - great for transporting bulky goods.
- Tipper - convenient during unloading and allows you to increase their productivity.
When planning to purchase a trailer or make a do-it-yourself cart for a walk-behind tractor, it is important to take into account some design features.
If everything is quite simple with one-piece trailers, then in the case of other types, this must be done. . Particular attention should be paid to the following factors:

Making a trailer with your own hands
After studying all the design options in the manufacture of a home-made trailer for a walk-behind tractor, the most simple options. A dumping device is certainly more difficult to make, but its functionality is an order of magnitude higher.
Do-it-yourself work on creating a towing device for a walk-behind tractor start with a drawing. Thanks to this, it is possible to determine the number necessary materials and select complex nodes that require the development of more accurate circuits.
It should be remembered that the center of gravity of a properly balanced trailer should be located closer to the front side, but at the same time not go beyond the level of the wheel axle.
Frame assembly
The reliability of the frame is determined by the durability and strength that the tow hitch will have. This should be taken into account when creating a project for a future towing device. Thus, in the manufacture of the trailer frame, the following materials can be used:

Is a pretty simple thing. Some homeowners decide to make more sophisticated devices. In such a situation, all subsequent actions depend on the choice of a particular type of trailer:
- On a tipper hitch, the tailgate must be hinged.
- If it is planned to manufacture a trailer with folding sides, then all three sides, except for the front one, should have such a design.
- Frames of folding elements should be made separately from the general frame. For simple models they may be its common elements.

Frame sheathing
This is one of the most simple steps in the creation of a towing device. However, some nuances are present and must be taken into account. To carry out work on the frame sheathing, it is worth choosing those materials that cannot increase the cost of the tow hitch:

First you need to sheathe the bottom (floor) of the trailer, and then deal with its sides.
Chassis
This structural element can be taken from an old vehicle, such as a garden wheelbarrow. An additional pipe is required for its fastening. The hub can be pressed on, and its rear part can be bored and strengthened on the axle. At the same time, it is extremely important to ensure that there are no distortions.
 For mounting wheels the best option are the pins. They will provide a fairly reliable and long-term connection. Bolted connections can be used to strengthen structures. The final stage of work on the manufacture of the chassis will be the fastening of the caps.
After creating the towing device, it remains to make a hitch. This is a separate element, which is at the same time very responsible. Most in a simple way the connection of the walk-behind tractor with the trailer is the "pipe in pipe" assembly. To one end in advance bent pipe a short piece of pipe is attached in a vertical position.
At the opposite end of the main element (curved pipe), a second segment is welded, and a kingpin must be fixed on it, which will act as a connecting element. This robust construction easy to manufacture and highly reliable.
When planning the purchase of a walk-behind tractor, you almost always have to think about good attachments for full-fledged work on land plot. Attachments for a plow and a trailer for a walk-behind tractor are needed like air. You can’t argue with this statement, but they cost a lot, and it’s not always possible to find money to buy such a gun carriage from limited budget ordinary person. Therefore, it is better to spend the bulk of the capital on acquiring a cool powerful motor unit with an American or Japanese engine, and make a trailer for a motor block with your own hands. Moreover, finding drawings for any version of a trailer for a walk-behind tractor is not a problem.
Trailer options for motoblock
Depending on the planned transportation volumes, the method of using the trailer and the capabilities of the walk-behind tractor, several different options can be made:

Important! The main reason why trailers for a walk-behind tractor fail is that a 120 kg carriage is loaded with more than the carrying capacity and dimensions of the trailer allow.

The heavy option will allow you to transfer at once the attachments, the plow, and the entire stock of potatoes for planting. The service life of such a machine is calculated in tens of years.

Trailer frame: 1 - brace (corner 21x21x3), 2 - seat frame (corner 21x21x3), 3 - riser (pipe 50x25x4), 4 - seat posts (corner 40x40x4), 5.14 - front struts (pipe 50x25), 6, 15 - longitudinal spars (corner 40x40x4), 7.8 - right wheel axle supports (corner 32x32x4), 9.16 - rear struts (pipe 50x25), 10 - reinforcing cross member (corner 40x40x4), 11 - body of the longitudinal hinge (pipe 58x4 ), 12 - wheel axle (bar with a diameter of 30), 13.17 - transverse spars (corner 40x40x4), 18 - scarves (s4)
How to make a trailer for a walk-behind tractor with your own hands
To build a heavy and stable trailer for a walk-behind tractor, we need the following equipment and materials:
- Electric welding machine, grinder, electric drill with a set of drills, with a dozen electrodes No. 4;
- Steel profile - tubular square 40x40 mm. -20m, 20x40mm. -15m., steel pipe with an inner diameter corresponding to the outer dimension of the hub bearing, sheet metal 2mm thick. and a total area of 2x3m.;
- Two complete hubs, from an M2140 or M412 car, a pair of Moskvich wheels with “live” rubber, two pairs of canopies for garage doors.
Work on the manufacture of a trailer for a walk-behind tractor with painting work will take at least three days. The main dimensions of the trailer are clear from the diagram, the load capacity of the above diagram is at least 500 kg, more weight is dangerous for a conventional walk-behind tractor. If you purchased a ZUBR or Garden Scout GS 101DE motoblock with a 12 horsepower diesel engine, you can load more.
We assemble the frame according to the drawings and photos
At the initial stage, it is necessary to cut the material and weld the skeleton for the cargo compartment of the trailer by electric welding. It is a rectangular frame welded from a square section metal profile. If you follow the drawings, you get 120x180 cm. We will make 150x200 cm. Inside the rectangular frame, you need to make two transverse spacers, as in the photo. This will strengthen the bottom of the cargo compartment of the future trailer.
Next, cut out from the profile 40x20mm. and weld four sides, each 500 mm high. The sides are sewn up with steel sheets and welded to the base of the cargo compartment, a sheet of metal is laid on the bottom and fastened to the metal profile beams. The tailgate can be mounted on large door awnings, allowing it to be folded down when unloading. All welded parts of the structure are carefully treated with a rust converter and coated with a primer.

At the next stage, it is necessary to cut out from the metal profile and weld the towing device for attaching to the walk-behind tractor and the supporting frame, on which the previously manufactured trailer cargo compartment will be installed.
The shape and dimensions of the supporting frame, and the method of attaching the trailer to the walk-behind tractor are clear from the photo. The dimensions of the square part of the frame correspond to half of the cargo compartment.

Canopies must be carefully leveled and welded with the highest welding quality. Thanks to this rationalization, the cargo compartment of the trailer will be able to tip over for unloading without changing the position of the walk-behind tractor.
We make the undercarriage of the trailer to the walk-behind tractor
The trailer will be made on rubber running, this will greatly simplify the control of the walk-behind tractor, increase safety and comfort when driving. Wheels with hubs on two support bearings provide minimal rolling resistance, so even with a fully loaded cargo compartment, the walk-behind tractor will easily pass through the primer or even grassy soil.
This option does not use full braking devices, but technically there is such an opportunity, and if you wish, you can supplement the hubs with covers and brake pads from M412. In order not to mess with the hydraulics, you can use a cable drive from the hand brake.

To install a pipe with bearings and hubs on a trailer, you must first cut and weld to the frame three supporting vertical posts made of metal profile 40x40mm, each 120-150 mm high. When installing the pipe, a lot of patience will be required to accurately position the undercarriage parallel to the cross member of the trailer frame. The tubular axle allows for high strength and rigidity even when the maximum load is doubled or when cornering at a high speed, as for a walk-behind tractor.
Next, we weld the pipe, install and adjust the position of the hubs in the pipe so that the runout of the wheel disk, dressed and screwed with nuts on the hub, is minimal. Immediately after leveling is completed, tack the seam with welding points and weld a full seam.
To reduce the load on the vertical racks, it is necessary to cut and weld reinforcements in the form of a metal profile from the pipe to the frame frame.
To attach a trailer to a walk-behind tractor, you can remake a standard hitch based on a plow or make an adapter like a towbar. The main condition is that the connection must be able to freely rotate in a horizontal plane, not interfere with the control of the walk-behind tractor and be strong enough, given the large weight of the structure.

On the triangle of the trailer, you must install a vertical stand with a bench or seat for the driver. The height and location of the seat is chosen based on the length of the walk-behind tractor control knobs. It is recommended to close the space under your feet with a metal mesh or welded thin fittings.
Conclusion
Driving a heavy carriage to a walk-behind tractor will require a certain skill, so the first attempts should be made exclusively in deserted areas. In addition, for this kind of construction, traffic police officers may require registration and equipment of a gun carriage for a walk-behind tractor with dimensions, brake lights, and brakes.
Many farmers are interested in how to make a trailer for a walk-behind tractor with their own hands. Additional attachments to the walk-behind tractor, such as a trailer, expand the capabilities of the technique. The process of transporting firewood, hay, livestock feed, as well as any other cargo is facilitated.
What is a trailer for a walk-behind tractor
The towing device for the walk-behind tractor consists of:
- body;
- wheels;
- wings;
- seats;
- drawbar;
- brakes.
The ability of the body to withstand a particular load depends on the quality of the assembly. The trolley must be made of durable material that can withstand the weight of the load and all weather conditions. In addition, it is desirable that it has folding sides for ease of loading and unloading. Dimensions must be roomy and match the power of the walk-behind tractor.
Wheels are used on carts: automobile, from a motorcycle, etc. The main thing is that it can withstand heavy loads.
Wide wheels are most preferable, as this increases the vehicle's cross-country ability.
Wings are also on cars. They serve as protection against stones and dirt from the wheels.
All modern trailers are equipped with seats. Some craftsmen build a box under them to store the necessary things.
The drawbar is a triangle-shaped mount that connects the trailer to the walk-behind tractor.
Brakes will improve the process of transporting goods.
Trailer equipment for walk-behind tractors can be purchased from manufacturers of agricultural machinery, or you can make a home-made trailer for a walk-behind tractor. Let's consider both options.
There are many ready-made models for motor cultivators on the market. They have different sizes, weight category, carrying capacity and cost. Their plus is that they are assembled by professional mechanics according to pre-designed schemes. You don't waste your time or energy on it. The disadvantages are, firstly, in the search for a conscientious manufacturer that sells quality goods, and secondly, a good product is not cheap.

The walk-behind tractor plays the role of a horse team. It acts as a drive connected by a drawbar to the trailer. For this purpose, such brands of walk-behind tractors as: Patriot, Ural, Cayman 320, Forza, Crosser, Foreman, Viking, Texas are suitable.
You can make a trailer for the Neva walk-behind tractor, made of durable metal. Load capacity of the body 500 kg. The trolley has a brake drive, which makes driving easier. On the Internet, you can find a lot of drawings of trailers for the Neva walk-behind tractor. They have good design with minimal consumables.
See » Operating instructions for motoblock Kutaisi Super 610
Among the finished models, you can find a device with a dump truck function. The design is basically the same as on a conventional trolley, but with a modification that allows unloading by folding the box. Although such a model is more expensive, it is necessary on the farm.
The manufacture and assembly of the trolley is often done by the owners of the walk-behind tractors themselves. There are a lot of homemade products, but they can be assembled according to one principle - a running gear on wheels, sides and an axle to connect the trailer to a walk-behind tractor.
How to make a trailer for a walk-behind tractor with your own hands
Consider how to make a trailer for a walk-behind tractor with your own hands. It is important to be able to read drawings and diagrams, as well as to have the skills to use some tools.

A home-made trailer for a walk-behind tractor is made according to diagrams and drawings, which can now be found in large numbers on sites on the Internet. Before you get to work, you need to develop a drawing of a trailer for a walk-behind tractor. In addition, it is necessary to prepare all small parts for fastening, tools and welding machine.
The dimensions of the trailer for a walk-behind tractor must be clearly drawn on the diagram, each detail is marked and highlighted from different sides.
It is necessary to assemble the trailer, based on the power and dimensions of the walk-behind tractor. Equipment with insufficient traction power will not pull a heavy semi-trailer.
Having dealt with the scheme, it is necessary to decide on the leading parts of the trailer. The basis is a frame and a hitch for a walk-behind tractor trailer. They are followed by a frame, a driver's seat and wheels (2 or 4 pcs.).
They usually start with the main component of the cart - the frame, since it is on it that all the load falls during the transportation of goods, so it must be extremely strong. The ideal option would be a ready-made axle with wheels, in which case you do not have to spend time and energy on additional settings. It is important that the materials are solid and not deformable. You can use pipes or a thick channel.

The easiest way is a trailer variant assembled from 60x30 mm pipes welded together in the form of a frame. A traverse (steel crossbar) is attached to them. Transverse pipes are attached from different sides, which in the future will serve as racks. For strapping, pipes with a cross section of 25 mm are welded to the racks, and at the end - corner supports.
See » Review of the Brest MB-9 walk-behind tractor and owner reviews
It is preferable to weld the parts of the trolley together; bolting is considered not very reliable and short-lived. To reinforce the trolley, braces are added from below and an amplifier is welded.
After completion of the support proceed to the assembly of the body. Any materials are suitable for this: wooden and metal, and a combined version is also possible. It is desirable, of course, to make the base metal. For strength, it is preferable to make the bottom double. To make the sides fasten better, corners are welded along the edges. For easy loading and unloading, the sides can be made folding by placing them on a movable mount.
There is no need to choose very heavy materials, as the weight of the assembled trailer will overload the engine of the walk-behind tractor. The simplest body is able to withstand weight up to 500 kg, and this is enough for a small farm.

It is better to take wheels from used equipment, they already have hubs. The rods are being prepared on which the wheels will be held. It is desirable that the wheels are located directly under the sides. To mount the wheels, the rod is pre-sharpened to the size of the hub bearing. Instead of a rod, you can use devices from a VAZ beam.
How to make trailer brakes
Brakes for the motoblock trailer. The braking system facilitates and increases the safety of cargo transportation. There are many options for brakes, but as practice has shown, the brakes from the motorcycle turned out to be the most effective.
How to make brakes on a trailer to a walk-behind tractor? Homemade trailer brakes are made from a cable, rod and drum. The drum must be attached to the rear wheel hub. The free spaces between the protrusions are filled with large wire. Next, a piece of pipe is welded to a pre-sharpened disc, which is mounted on the axle. Brake pads are attached to it, from which the cable to the lever will come. The brake is installed on only 1 wheel and this is quite enough to perform this function.
You can make any seat on a walk-behind tractor with your own hands. It can be short or oblong. It is made in the form of a box or chest, in which you can later put tools or improvised items. If the side of the trolley is too low, then it is better to come up with a seat with a back so as not to strain the spine. To increase comfort, it is better to sheathe it with soft material.

If a chair or armchair is used as a seat, then 2 deep slots are made for the legs, for immersion inside. Thus, the chair becomes removable.
See » Overview of walk-behind tractors and attachments Ugra
To attach a trailer to a walk-behind tractor, you need a hitch and a console. They can be removed from any decommissioned equipment.
The device for the trailer can have 1 axle, which has a weak center of gravity. It is important to properly position the body so that there is no overstressing at the coupling point. Therefore, the center of gravity must fall under the axle of the wheels. With two-axle trailers it is much more reliable. The distribution of the weight of the load falls not on 2, but on 4 wheels. They are suitable for carrying loads up to 1400 kg. You can use a car trailer.
How to attach a trailer to a walk-behind tractor
Farmers are interested in how to attach a car trailer to a walk-behind tractor. To do this, you need an adapter for a walk-behind tractor, which you can build yourself. To connect the trailer to the walk-behind tractor, you need to remove the ball joint (towbars), and instead connect the hitch of the walk-behind tractor. When attaching a trailer to a walk-behind tractor, it is important to take into account 1 nuance regarding trailers: they do not have a brake system and a seat for drivers, because they are not designed for a walk-behind tractor. If the trailer does not drive onto a flat track, then in principle it is possible to do without brakes, but the seat must be built.
A trailer with steering is a separate device on wheels with a seat, in front of which there is a walk-behind tractor, and behind a trolley. Such a connection of the trailer with a walk-behind tractor turns the equipment into a mini-tractor.
Farmers use a trailer from an Ant scooter as a finished cart. The body of the scooter is very durable. It is indispensable for transporting heavy loads. It can easily transport up to 10 bags of compound feed, 500 kg of coal or 0.5 m³ of firewood. The tailgate opens. If desired, the height of the sides can be increased to the desired size.