In this article we bring to your attention a very successful project for a two-story bathhouse with a terrace; if desired, you can later install a heating boiler and use the building all year round. The dimensions of the bathhouse are 6x6 m, which makes it possible to have enough space for comfortable stay. On the ground floor there is a steam room (3.4 m2), a sink (4.3 m2), and a relaxation room (16.7 m2). The second floor is allocated for two bedrooms, one of them is large and designed for two people. In the hall of the second floor you can place wardrobes for clothes.

A rotary staircase leads from the first to the second floor.


By the way, we have not yet considered in detail the construction of stairs; there was no such need for ordinary baths. In this article we will tell you in detail about the construction of a staircase and we assure you that making it if you have the desire and patience is not so difficult.

Brief description of the design features and materials used of a two-story bathhouse
For the manufacture of the log house, sawn timber 150×150 mm was used, the roofing was ondulin, the cladding of the internal and external walls was made of natural lining. For the facade, you can replace natural lining with cheaper materials.
The foundation is shallow reinforced strip foundation.

The lower strapping row is made of 150x150 mm timber impregnated with antiseptics. For the logs, boards of 50×150 mm are required, the log pitch is 60 cm. To install the subfloor under the insulation of the first floor, they are attached cranial bars 50x50 mm, they are nailed to the sides of the floor beams.


The log house is made of sawn timber 150×150 mm; it is advisable to impregnate the strapping row with antiseptics. The underground bathhouse is very damp; additional protection will make it possible to reliably protect the wooden elements from damage.
The floor beams and rafters are made of 50x150 mm boards, pitch 80 centimeters. For lathing, you can take 20x50 mm slats or unedged boards 20 mm thick.

The roof is insulated. It is not practical for economic reasons to create an unused attic on a two-story bathhouse.
Mineral wool or glass wool is used as insulation.

It’s worth talking a little about insulation. Manufacturers' advertisements claim that only mineral "basalt" wool is the most the best material, it does not prick, does not cause allergic reactions, etc. Due to such “outstanding properties” of mineral wool, all manufacturers have significantly increased its price.

What is it really? Basalt contains more than 50% glass, which is the main component of basalt wool (as for glass wool), all other impurities are purified. Then what is the difference in chemical composition between ordinary glass wool and mineral wool?
Further, why does glass wool crack, but mineral wool does not? And everything is simple here. Previously, technology did not allow glass fibers to be made very thin, which meant they had enough “strength” to create discomfort. Today, glass wool can be made with very thin fibers; it no longer rips. Another point that manufacturers do not talk about.
In terms of cost, glass production will be much more expensive than using ready-made volcanic glass (basalt). Then why is the price of mineral wool so much higher than glass wool? And everything is simple here. Advertising serves producers, not consumers. A competent advertising campaign made it possible to sell mineral wool at much higher prices than production costs, and due to this, profits increase. We settled on cotton wool only to convince you not to blindly trust advertising, but to think when choosing materials. Conclusion: not everything that is more expensive has better performance characteristics.
Prices for wooden slats
wooden slats
Video - Properties of Rockwool stone wool
Veneered boards 40 mm thick are used for the gables; the cornices and corners of the frame are covered with clapboard. Four windows are installed in the gables; you can use plastic ones or make them wooden. For self-made wooden windows require solid knowledge and woodworking machines.


Rafter system gable roof with vertical support posts, the legs are connected at the top by a jumper.

The top two rows of the log house need to be fixed with an increased number of dowels; it is better to use metal rods. The last row of the log house serves as a mauerlat and will absorb significant lateral loads from the rafter legs.


Roof. Ondulin is used to cover the roof - an excellent coating in terms of quality and price.

Under this material, a lath is made of 20×50 mm slats; instead of slats, you can take unedged boards, used boards left after dismantling the foundation formwork, etc. Ondulin is attached with special nails; you only need to drive nails into top part waves. It is necessary to put waterproofing under the ondulin, an overlap of at least 10 centimeters, the insulation is fixed with a stapler.


It is necessary to install a rainwater drainage system; during its installation, do not damage the ondulin sheets, it does not have enough strength. Do not forget to make the drain trays slope approximately 3÷5°, and provide for water drainage from the foundation.


Prices for tongue and groove boards
tongue and groove boards
Construction planning stages
As with any construction, the cost and quality of the work performed depends on comprehensive compliance with all stages. Hence the conclusion - there is no need to rush, it is much more profitable to plan and think through everything in advance, this will allow the work to be done much faster and cheaper.
Step 1. Choosing a specific location for the bathhouse.


A wooden two-story bathhouse has strict fire safety requirements; when choosing a location, you must be guided by the provisions of SNiP 2.07.01–89. They regulate the minimum distances between adjacent buildings. Very important - failure to comply with these rules will cause big problems during the period of registration of the building in government agencies self-government. One more nuance. The site must be as level as possible, the physical characteristics of the soil must correspond to those of the foundations. Compliance with these conditions will allow you to save significant funds on excavation work.
SNiP 2.07.01–89 download. URBAN PLANNING. PLANNING AND DEVELOPMENT OF URBAN AND RURAL SETTLEMENTS .
Step 2. Choice of foundation. We propose to use a shallow reinforced strip foundation on a sand cushion.

Screw pile foundations are quite good in all respects; this type of foundation can be used on any soil and in all climatic zones. The only drawback is that you can’t do it yourself; you need to contact specialized construction companies.

The advantages of a reinforced strip foundation on a sand cushion are that at a shallow depth (within one meter), the building will be stable in various climatic zones. Stability is ensured by a sand cushion up to 30 cm thick. For reinforcement, you can use construction reinforcement of a periodic profile Ø 8÷10 mm.
Step 3. Log house Make the log house from sawn timber 150×150 mm; to insulate the crowns you can use tow or fiber. There is no particular difference in physical characteristics between these materials, but working with fiber is much easier and faster. In addition, the amount of shrinkage of the structure is reduced, and interior finishing work can begin faster.


Step 4. Floors. There are certain difficulties here. On the ground floor there is a bathhouse and a sink; their floors should be made of natural boards, and a water drainage system should be provided. In the rest room, you can lay floors using insulation. But be very careful - the steam from the hot water pouring out of the steam room and sink does not have time to be quickly ventilated by the vents. This means that everything is underground wooden structures should be thoroughly impregnated with antiseptics, and the insulation of the floors of the rest room should be protected from the penetration of steam.
Prices for timber
Video - Floor in the bathhouse (preparing boards)
Video – Do-it-yourself bathhouse floor – installation
Video – Floor in the bathhouse
Video - Installation and insulation of the floor
Step 5. Ceilings. The ceiling on the second floor is made up of roof elements; they must be insulated using steam and water protection. Sheathing can be done with clapboard, plywood, OSB or sheets of plasterboard.


On the first floor the situation is different. All “professional builders” strongly recommend insulating the ceiling of the first floor (the floor of the second floor is installed on it), and they describe how much insulation, vapor and waterproofing, etc. are needed. These materials are purchased from manufacturers at fairly high prices.

First, a little physics. Hot air in the rooms on the first floor rises to the ceiling and heats it. The warm ceiling transmits “degrees” to the floor of the second floor and turns it into “heated”, and for free. The insulation prevents the floor of the second floor from being heated by free energy. The question is, why insulate the ceiling on the first floor in order to lower the temperature on the second floor with your own hands and your own money? We recommend insulation only in one case: the first floor is not heated, and the second floor has an autonomous heating system. In all other cases, no additional insulation should be done. This rule does not apply to the steam room; it has its own characteristics.

Step 6. Steam room and wash room. There is high relative humidity and temperature, and wooden structures are exposed to very difficult conditions. More recently, aluminum foil has become widespread among vapor barrier materials; it is strongly recommended to be used for all buildings without exception, including wooden ones. Manufacturers cite only one advantage of foil - absolute impermeability. It is strongly recommended to use it to insulate the steam room log from condensation; it is recommended to install foil between the wall cladding and the log house and between the ceiling cladding and sub-ceilings.

What do practitioners advise? Condensation will certainly form on the foil due to temperature differences and high air humidity. Where will this condensate go? Constantly drip onto the finished ceiling trim or flow onto the floor under the trim. In this case, the slats to which the sheathing is attached will remain wet for a long time. ABOUT natural ventilation It’s not even worth talking theoretically between the sheathing and the foil; it is completely absent in these places. What will happen to constantly wet lining? That's it. We only advise and share our experience; the decision must be made by each developer independently.

In order to make it even easier for you to choose a construction technology, a few words should be said about all wooden buildings. Every article about these materials begins with the words that “wooden buildings breathe, this is their important advantage.” Everything is correct. Only wood does not “swallow air with its mouth”, but is capable, due to the phenomenon of hygroscopicity, of transferring excess moisture from the premises to the outside and vice versa. If the humidity in the room is much lower than outside, then the tree gradually equalizes the indicators. It is this process that should be meant by the slang “the tree breathes.”

Due to these properties, humidity wooden elements constantly remains in optimal values, unless, of course, the builders have a hand in it. How can a wall made of natural timber breathe if its surface is hermetically sealed with aluminum foil? Why do ordinary bathhouses in villages last for many decades, although no effort was made during their construction? modern technologies and no materials were used? During the renovation, only a few lower crowns are changed, and the bathhouse is again like new. We don’t even need to change the crowns; now we have the opportunity to soak them with antiseptics. You just need to choose the right construction technology for each specific building and for each specific case.

“Liquid glassine” Processing of the lower crowns and beams of a log house

We hope that now the acceptance algorithm will be clearer to you optimal solutions during the determination of methods and materials for the construction of a two-story bathhouse. Let's move on to one of the complex structural elements - the rotary staircase.
Prices for liquid glassine
liquid glassine

The ability to make such a staircase will be useful not only (and not so much) in the construction of baths, but in our case we cannot do without it at all. For production you will need boards 50×200 mm, 40×200 mm and 25×150 mm. It is better to purchase balusters and handrails in a specialized store or order them from a professional craftsman. All other work can be done independently.

Step 1. Calculation of the dimensions of the stairs.
Although this topic seems to be the most difficult for many, it is actually the most simple work. During calculations, existing recommendations are taken into account: the total height and width of the steps should be ≈ 47 centimeters, the width of the steps ranges from 20÷32 cm, the height of the step is ≈18 cm. optimal sizes The accepted width of the steps is 30 cm and the height of the riser is 15 cm. The angle of inclination of the stairs is ≈30°.


Of course, these are ideal sizes; they do not always correspond to practical data. In our case, the total height of the stairs will be 250 (ceiling height) +20 (ceiling height) = 270 centimeters. We divide this amount by the optimal height of each degree (18 cm) and get exactly 15 steps. If you get a number with a fraction, then the number of steps must be rounded to the nearest whole number, with the first step being slightly higher or lower than the rest. If you want to make all the steps the same, you will have to use tenths of a millimeter during measurements.

Step 2. Take measurements.
You need to know the height of the stairs, the length of the stringers, bowstrings and all the dimensions of the steps. Don't forget that the thickness of the boards is included in their dimensions. On one side, the string rests against the supporting beam, on the other side, the stringers are fixed to the wall.

Step 3. Make a template of steps and risers from plywood, estimate their sizes and location again.


Cut out seats for steps in the stringers, secure the stringers to the wall and to the support beam. Check the position of the stringers; if problems are found, correct them. The staircase elements are attached to the wall strong self-tapping screws or nails.

Step 4. To fit the template, cut out the blanks for steps and risers, sand the cut areas, make chamfers and precisely adjust all the individual parts to the same size. Make mounting sockets in the string for attaching the steps. You can do them by hand (not very accurate for a long time) or use a hand-held electric router.

Step 5. Using a plumb line and level, check the spatial position of the stringers and the places where the bowstring is attached. Begin to install steps on the seats one by one. If necessary, make final adjustments to each element. Try to achieve such precision that the cracks at the joints completely disappear. Connect the elements of the stairs with self-tapping screws, recess the heads and seal the holes. We strongly recommend that you additionally coat the joints with wood glue; this will be an additional guarantee that the stairs will not begin to creak over time when walking.

Lastly, the balusters and railings are attached. There are several ways to attach them, we will briefly talk about each of them, and you choose the appropriate option for yourself. The distance between the balusters should be within 30 cm; select specific values taking into account the width of the degrees. The height of the railing is ≈90 centimeters. Secure fastening you need to do it at least two points: to the railings and stringers or bowstrings. Some wide steps allow balusters to be attached to their ends, but such options are very rare.


| No. | Description of work |
|---|---|
| Step 1. | Mark the locations of each baluster, the accuracy of the marking should be at the maximum level. It is better to mark the location of the balusters on the steps with a rope with blue. |
| Step 2. | Saw off the upper ends of the balusters at the angle of the stairs, make markings for the holes exactly in the center. The railings must be positioned strictly parallel to the stringers or bowstrings. Fastening can be done with studs, screws or dowels. The best option is to use wooden dowels. |
| Step 3. | At the bottom end of each baluster you need to drill a hole with a diameter of 10÷12 mm, insert dowels into them using wood glue. The same holes need to be made in the steps; the depth of the holes in the steps is no more than 2/3 of their thickness. Don't "overdo it" or drill all the way through the step. You can control the depth of the holes using a simple device. Wrap insulating tape around the drill at the required distance from its end. This will be your all-purpose marker. The pins should fit into both holes with little effort. If you are assembling a ladder using self-tapping screws, then the holes should have a diameter of 1÷2 mm less than the diameter of the self-tapping screw. |
| Step 4. | Check the position of each baluster. If everything is normal, leave them until the wood glue dries completely. |
| Step 5. | Proceed with the installation of handrails. Before this, the handrails should already have holes for the top pins of the balusters. Lubricate all parts with wood glue, install in place, check the position and leave to dry. |
| Step 6. | Sand all visible surfaces of the stairs well, remove burrs, and seal cracks and crevices with special putty. Cover the stairs with several layers of varnish or paint. |

Terrace
This is where the knowledge acquired while making the stairs will come in handy. The length of our terrace is 3 m, width 1.5 m, vertical supports made of sawn timber 150×150 mm. The timber should be of the highest quality; choose it for supports even during the laying of the log house. Please make sure that there are no rotten knots or cracks on it, all four edges are parallel, and there are no bends. The timber must be thoroughly sanded, sharp corners must be chamfered.


The upper part is connected to the sauna frame, the lower part is installed on the foundation; for waterproofing, use two layers of roofing felt. Perfect option– the beam sits on an anchor, concreted during the pouring of the foundation. If it is difficult for you to accurately calculate the position of the anchor, then fix the vertical supports with metal corners on screws and dowels.


Video - Installation of shrink jacks
Terrace fencing made of balusters and railings. The fastening of the balusters is the same as we described for the stairs. There is only one difference - all cuts at the ends should be made not at a slope, but at an angle of 90°. Carefully mark and drill holes, balusters are attached to dowels, do not forget to use wood glue.

Railings can be attached to vertical posts with a tenon (a rather complex method) or with corners (the simplest method). We advise you to use corners; in terms of their physical characteristics, they are more reliable than tenon ones. In the lower part of the railing and supports, you need to cut out the seats for the corners with a chisel, work very carefully, the dimensions of the seats must correspond to the dimensions of the metal corners.
Video – Bathhouse made of timber 6 x 6 m (turnkey)
Video - Do-it-yourself sauna made of timber
Video – Timber bathhouse with terrace


A bathhouse is not just a place where a Russian person washes, it is part of the culture. Here we rest our bodies, cleanse our souls and put our thoughts in order, so it is important to maintain the ideal proportions of the structure. The layout of the bathhouse must meet the owner's expectations.
A 6x6 sauna will satisfy the needs of even a large family or will be a great addition for relaxation in the company of friends. The balanced size allows you to place all the necessary rooms inside (steam room, washing room, relaxation room), without wasting your budget on an unnecessary increase in space. What 6x6 baths can be like: projects and layout will be revealed in our article.
 Source mebel-go.ru
The square shape of the structure and its small dimensions open up a wide field for experiments with the design of a 6x6 bathhouse, materials and internal filling. One- and two-story, with an attic and a terrace, built from wooden beams, logs, bricks or building blocks - it will be easy for you to choose the most suitable option for yourself.
Wooden baths
Wood is the most common material for construction. Baths from it are built using two technologies: processed, dried and sawn timber or rounded logs of primary processing. Each method has its own advantages:
The beams are cheaper and weigh less, which affects the speed of construction.
A log bathhouse looks more natural and original.
Which option to choose is up to you, but we recommend timber as optimal. It has already been dried and shows minimal shrinkage, but the logs will show slight deformation, which will need to be corrected later. initial stages operation of the bathhouse.
 Source barskydom.ru
Layout of a 6x6 wooden bath: possible options
There are a lot variety of options 6x6 bathhouse layout, it all depends on your preferences and wishes. You can choose a standard bathhouse design with a ready-made layout or create a special one that has never been seen anywhere else. For a 6 by 6 bathhouse, the interior layout, the photo of which is shown below, is considered classic.
 Source th.aviarydecor.com
Bathhouse with porch
Classical, functional option 6 by 6 bathhouse layout without frills, which was abandoned to increase usable space. Among the advantages of this type of timber bathhouse it is worth noting:
the presence of windows in each room allows you to use fewer artificial lights, saving on electricity;
a compact steam room with enough space so that people do not feel discomfort;
an enlarged shower room allows you to freely accommodate four or more people;
between the rooms there is a small corridor where you can build shelves for towels, brooms, washcloths and soap;
The lounge room has enough space to install a table and sofas.
The disadvantage of this 6x6 bathhouse layout is the lack of a covered terrace where you can place a barbecue or chairs for relaxing in the fresh air. But this can always be solved: a terrace can be added to finished project. This option can also be used in more modest buildings: for example, for a 4 by 6 bathhouse, the interior layout (photos of interiors are also presented in large quantities) may not include a rest room at all, which is completely taken out onto the terrace.
 Source postroim-dachi.ru
Bathhouse with terrace
The layout of this bathhouse is characterized by increased comfort. The advantages of a 6x6 bathhouse with a terrace include: large room rest, which will accommodate not only a table with seats, but also additional equipment. For a 6 by 3 bathhouse, the layout may also include a terrace, which is located along the long side.
The steam room and shower are not designed for a large number of people visiting at the same time, but their compact dimensions allow these rooms to be quickly heated and used in shifts.
The open terrace is ideal for sitting comfortably warm time years after undergoing bath procedures. For a 6x6 bathhouse, the layout, the photo of which is posted below, is one of the proven standard options.
 Source samdizajner.ru
Bathhouse 6x6 with terrace and attic
A bathhouse made of 6x6 timber with an attic offers a lot of options for using additional space. This could be, for example, another large recreation room where you can equip a billiard room.
In addition, in the attic you can equip a room for guests who come and stay overnight, or a large dining room for celebrations, banquets and parties.
The project is additionally equipped with a spacious balcony, which allows everyone to sit comfortably on it.
 Source himcomp.ru
Layout of a 6x6 bathhouse with an attic, a balcony and an open terrace
Bathhouse with attic
Another good option for planning a “health house” is a 6x6 bathhouse made of timber with a porch and attic. Here maximum space is allocated to recreation areas. The positive features of this layout include:
There is a small vestibule, you get there from the porch. It will become an additional barrier to cold air and will allow you to retain heat in the room longer.
Windows in the rest room and shower allow for high levels of natural light.
In the steam room, the window was removed to reduce heat transfer into the room.
The large attic provides many options for using the usable space.
The disadvantages of such a layout include the small area of functional premises: steam room and shower, as well as the lack of a bathroom. But with a strong desire, this drawback can be corrected; a 6x3 bathhouse, the layout of which allows for even less wandering, will not provide such a chance at all.
 Source prefer.ru.net
Bathhouse 6x6 with attic and terrace
The most ascetic and budget option for planning a bathhouse. Its advantages include the large size of the relaxation room, an attic without partitions and an open terrace where additional space can be accommodated. necessary equipment, for example, barbecue.
Look detailed review 6x6 baths made of timber on video:
On our website you can find contacts construction companies who offer the service of building a bathhouse. You can communicate directly with representatives by visiting the “Low-Rise Country” exhibition of houses.
Among the disadvantages that a 6x6 bathhouse may have (the layout of the example photo below), it is worth noting the absence of a vestibule, which reduces protection from cold air in winter time, which means that the cost of heating and maintaining the appropriate temperature in the premises increases.
 Source 9ban.ru
Alternative building materials suitable for building a bathhouse
Tree - best option for building a bathhouse, but if for certain reasons it is not suitable for you, then there is an alternative: brick and foam block.
Brick buildings are characterized by increased stability and will last a long time, but they require considerable costs and more time for construction. It is also worth noting the impressive weight brick bath, because of which she will need a full-fledged foundation, which will also increase the final cost.
Source rabotayout.ru
Foam block will be an excellent replacement for brick. The advantages of the material include:
high porosity, which increases natural air circulation;
less weight with a larger size of individual parts, which reduces construction time;
low level of heat transfer, due to which the structure heats up faster and cools down longer.
However, there is also a minus: foam block baths require exterior finishing to limit high air permeability and refine appearance building.
 Source himcomp.ru
The design of a 6 by 6 bathhouse made of foam blocks in the photo above is characterized by high fullness and an optimal ratio of room sizes. Sufficient space for comfortable relaxation allows you to avoid reducing the area of the shower and steam room.
Video description
For more information about which material is best suited for building a bathhouse, watch the video:
Options for zoning bath space
The compact dimensions of the building do not impose serious restrictions on the number and size of rooms inside the bathhouse. Thanks to the high skill of design engineers, everything you need can be placed inside.
Minimum option. Steam room, shower and relaxation room. It features an increased area of each room.
Comfortable option. A separate bathroom is added to the listed rooms.
Full version. Additionally, a vestibule at the entrance, a terrace, a dressing room and even a swimming pool are being designed. This option reduces the area of each room, but allows maximum use of the internal space of the bathhouse.
Depending on the budget, the size of the family/company and the specific purpose of construction, you can determine the optimal type of bathhouse zoning for yourself.
 Source bani-sbs.ru
The stove is one of the most important elements of the bathhouse
6 by 6 bathhouse designs made of timber are designed for simultaneous visits by a group of 3-4 people without loss of comfort. This leaves a certain imprint on the size of the steam room and shower, which must be heated and maintained at a certain temperature. A stone stove is optimal for these purposes. It warms up the rooms quickly enough and prevents them from cooling down quickly.
 Source stroisovet.com
In the case of building a two-story bathhouse, the pipe from the stove is removed along interior wall attic and lined with brick. The material will receive heat from the pipe, heat up and will serve as an excellent source of maintaining the temperature in the room.
Another option is to install two water tanks. One is installed downstairs in the room with the stove, the other is on the second floor, connecting to the chimney pipe, which allows you to heat the water in the tank, releasing heat into the room.
For more information about which stove to choose for a bath, watch the video:
In a one-story building, the stove can be positioned as follows:
Installation in a steam room. A standard option that allows you to control the degree of heating “from the front row”.
Combined installation. When the front part of the stove is brought into the rest room and used to heat both rooms evenly.
Separate installation. The stove is installed in the dressing room. At the same time, a woodpile or warehouse for other materials is also located there. If more than modern version heating appliances, this method allows you to change the temperature without entering the steam room.
Each option has its own advantages and is optimal for a specific bathhouse layout.
 Source doka-realty.net.ru
Filling the rest room
After a hot steam room, you need to calm down and normalize your body temperature. The ideal place for this is the rest room. Each owner decides for himself what will be located here, selecting the content in accordance with his tastes and goals. However, it is worth taking the materials and equipment used with a high degree of responsibility.
Furniture must be resistant to high temperature and moisture.
During installation lighting fixtures High-quality insulation is required.
You should not install lamps that are too bright, as this will not allow you to relax.
It is also advisable to keep the room in the same style. This has no functional significance, but will speak volumes about your sense of style.
 Source mirturbaz.ru
Location of the building on the site
The bathhouse is not the main building, so it is advisable to place it in the depths of the site, behind the house. This will give some privacy and increase the degree of comfort for vacationers.
If the layout of a 6 by 6 bathhouse does not provide space for a swimming pool, then in front of the entrance to the building you can install a barrel with cool water or equip a small pond, where it is so nice to take a dip after a hot steam room. If there is a separate exit to a natural body of water, the exit from the bathhouse should be located “facing” it in order to bring immersion into the water as close as possible and hide people from prying eyes.
 Source pinterest.com
Photo examples of 6x6 baths
For 6 by 6 baths, the projects, photos of which are presented below in the assortment, are the most popular options. Source test.srubyizbrevna.ru
 Source kayrosblog.ru
 Source 9dach.ru
 Source lesoresurs.com
 Source 9dach.ru
 Source chance.ru
 Source brusservis.ru
Source bouw.ru
 Source m.2gis.ru
Conclusion
A 6x6 sauna is the best option for making your wishes come true. To build it, you only need to choose a project, and the professionals will do the rest for you. Building a small bathhouse on your property will allow you to feel all the charm of cleansing your soul and body, which no bath can provide. And the feeling of comfort and deep calm that you get after water procedures is hardly possible to find anywhere else.
When going on vacation in nature, many people enjoy going to the bathhouse. Visiting a steam room is good for body and spirit. In addition, going to the bathhouse is a great opportunity to get together with the whole family or friends. Everyone can do it, the main thing is to follow a certain order of work. The first point in any construction is drawing up a project.
The size of the bath may vary. Some build small premises, others prefer large objects. If you have a fairly spacious area and you plan to go to the bathhouse with a group, then pay attention to the 6x6 bathhouse project.
Bathhouse 6x6: advantages
This sauna has good capacity; up to 8 people can feel comfortable in it. If you have a large family or many friends, this project is suitable for you.
At the same time, a 6x6 bathhouse has quite compact dimensions; it can be built even in a small area, but it will still have good capacity.
The cost of building such a bathhouse will also be low, especially if you choose inexpensive material, for example, build.
Bathhouse 6 by 6 is a good option for a small area. It can accommodate not only a steam room, a washing room and a vestibule, but also a bathroom, an attic, and a terrace, in which case relaxation in the bathhouse will become more comfortable.

Bathhouse 6 by 6: project and its features
A 6x6 bath plan can have different type, this size gives good opportunity implement many ideas.
The standard set of premises that must be in any bathhouse, regardless of its size, are: a steam room, a washing room and a relaxation room. This project will provide roomy and spacious rooms, so even a large group will be comfortable in them.

When choosing a bath plan, pay special attention to the size of the rest room. If there are usually no more than 4-5 people in the steam room and washing room, then the whole company gathers in the relaxation room. It should have room for a table and benches, and it is also important that people can move around it freely.
But keep in mind that if there is no vestibule, the rest room will be cool, and drafts may appear, since you will go directly into the room from the street.
The layout of a 6x6 bath may include other rooms. If you are going to go to the bathhouse all year round, then it is recommended to make a separate vestibule in it. It will protect the rest room from cold air. In addition, it is convenient to store in the dressing room outerwear, shoes and .
It’s not difficult to find or draw up a drawing of a 6x6 bathhouse with a full bathroom. Agree, it is much more convenient when the toilet is directly in the bathhouse, and you don’t have to run to the neighboring building, especially in winter. Moreover, the bathroom requires very little space (only 1.5-2 square meters), but the level of comfort in the bathhouse will increase significantly.

Many people prefer to build a 6x6 bathhouse, the layout of which includes a terrace. An open veranda is an excellent alternative to a relaxation room in summer time. Everyone loves being outdoors, especially on a warm summer day. It is also important that the terrace has a roof that will protect you from the rain and allow you to go outdoors even on a rainy day.
6x6 bathhouse projects are quite large in size, so you can provide for the presence of a swimming pool. It can be placed in the relaxation room, on the terrace or placed next to the bathhouse under a canopy. If your layout does not allow you to install a pool, you can limit yourself to a plunge pool.
Corner bath 6 by 6
The main advantage of a corner bath is its compactness. The convenience of its placement is also important, since such a building will fit perfectly into the corner of the land plot, leaving a spacious yard.
This project has a spacious washing area that can accommodate a plunge pool or a small pool. A large recreation room is suitable for a large company. This bathhouse has only 3 rooms and a terrace, but due to the absence of unnecessary rooms, the bathhouse is spacious and roomy.

Bathhouse 6x6 with bathroom and veranda
This project has a small porch, a separate vestibule, a steam room, a shower room, a relaxation room and a bathroom. The bathhouse turns out to be simple, so its construction will be inexpensive. At the same time, there are all the main rooms, so relaxation in the bathhouse is pleasant and comfortable.

Bathhouse 6 by 6 with attic
The layout of a 6x6 bathhouse with an attic and a toilet is suitable for those who want to use the building not only as a bathhouse, but also as a country house or guest house.
The bathhouse project has a spacious veranda where a table and benches can fit. On the second floor there is a 6x4 room where you can make a bedroom.


Two-story bathhouse 6x6: layout, photo
It has an important advantage: it is compact and roomy. This option is ideal for cases where the plot of land is small, but at the same time you want to make the building as functional as possible.
The layout includes a vestibule, steam room, boiler room, bathroom, and rest room. The second floor is occupied by a huge bedroom. If desired, it can be divided into several separate rooms. Another option is to place billiard tables on the second floor, create a massage area, create a children's corner, and in the end you will get a place for comfortable relaxation.

What material should I use to build a 6 by 6 bathhouse?
Traditionally, a bathhouse is built from a material that is familiar and widespread in Russia - wood. It creates a warm and pleasant atmosphere in the room, which has a beneficial effect on the human body.
For construction wooden bath use a log or timber.
A bathhouse made of rounded logs has an aesthetic appearance and does not require additional finishing. You can build a bathhouse from this material with your own hands.

The design of a bathhouse made of 6x6 timber is optimal. This material will cost much less than rounded logs, and the construction process from this material is much simpler.
Today you can buy timber 6 m long, so building a 6x6 bathhouse from this material will be easy.
A bathhouse made of 6x6 timber practically does not shrink, it does not need external and interior decoration. The building made of timber looks aesthetically pleasing. Timber is an environmentally friendly material; it easily withstands the effects of steam.

A frame bath is an economical option. It practically does not shrink, and even one person can build such a bathhouse. A frame sauna heats up quickly, so its fuel consumption is lower. But if you decide to build it, then you need to pay attention to vapor barrier, otherwise condensation will appear inside the frame.

Inexpensive option There will also be a block sauna. This material is safe and environmentally friendly, it has high thermal insulation properties. The advantage of blocks over wood is their hygiene; rodents, insects and fungus do not grow in the blocks. The material is fireproof. Building a bathhouse from blocks is a fairly simple and quick process.

A brick bathhouse is a reliable and strong structure that will last for many years. The brick is resistant to fire, fungus and insects. But building a brick bathhouse will cost much more, and besides, not everyone can build a structure themselves, without the help of specialists.

The designs of 6 by 6 baths are varied: they can be simple and include only 3 rooms, or they can have several floors, an attic, a bathroom and much more. The layout of a 6 by 6 bath can be compact and roomy at the same time; this option is perfect for small areas.
The cost of building a log bathhouse 6x6 without finishing under the roof is 385,000 rubles
- The foundation is support-column. 2 blocks per cabinet (for one-story houses) and 4 blocks in a cabinet per cement screed(for houses with an attic). Concrete blocks, solid, size 200x200x400 mm. The cabinets are installed on a compacted sand bed. Sand (PGS) is provided by the customer.
- External walls – profiled timber natural humidity section 145x90 mm (wall thickness – 90 mm) “block house” or straight profile.
- Total in the log house one-story baths– 16 crowns. There are 17 crowns in the log house of the baths with the attic.
- An open terrace (if any) on supports made of planed timber with a cross-section of 100*150 mm, with shrinkage jacks. The fencing is a handrail made of planed timber with a cross-section of 40*100 mm. Steps at the entrance.
- The clear ceiling height of the first floor (from the floor joist to the floor beam) for one-story baths is 2.15 m (+/-50mm); for baths with an attic 2.29 m (+/- 50 mm)
- The second floor is attic. Clear attic ceiling height (from floor beam to ceiling beam) – 2.25 m
- The height of the roof at the ridge for one-story baths is 1.20 m.
- The gables are a frame made of natural moisture boards with a section of 150*40 mm, 100*40 mm. The external finishing of the gables is lining (spruce/pine AB) 17*90 mm. Wind protection – NANOIZOL “A” (for buildings with an attic).
- In the gables of one-story buildings, a door (1 piece) and ventilation hatches (1 piece for each gable, under the ridge) are installed.
- In the gables of buildings with an attic, ventilation hatches are installed (3 pieces for each gable).
- Eaves and roof overhangs with a width of 200 mm (for one-story buildings) and 300 mm (for buildings with an attic). The cornices and overhangs are hemmed with clapboard (spruce/pine AB) 17*90 mm.
- Installation of window and doorways with a dressing crown, without installing casing bars.
- Assembly of a house/bath on the customer's site.
The price of a turnkey 6x6 bathhouse with a foundation and stove is 588,000 rubles
- The foundation is columnar. 2 blocks per cabinet (for one-story baths) and 4 blocks per cabinet on a cement screed (for baths with an attic). Concrete blocks, solid, size 200x200x400 mm. The cabinets are installed on a compacted sand bed. Sand (PGS) is provided by the customer.
- Waterproofing – roofing felt in one layer.
- The strapping is a beam of natural humidity with a cross-section of 150x100 mm. Along the outer perimeter the strapping is laid in two rows. The timber is processed protective composition.
- Floor joists - natural moisture board with a section of 40x150 mm per edge, with a pitch of 600 mm.
- The subfloor is a natural moisture board with a cross-section of 22x100mm. Steam, waterproofing – NANOIZOL S.
- Floor insulation – 100mm KNAUF/URSA mineral wool (or equivalent). Vapor barrier – NANOIZOL V.
- The finished floor of the first floor is a dry tongue-and-groove floorboard (spruce/pine AB) 36mm thick. Every fifth board is fastened with self-tapping screws (for the possibility of re-upholstering the floors in the future).
- External walls - profiled timber of natural humidity with a section of 145x90 mm (wall thickness - 90mm) "block house" profile or straight. A total of 16 crowns (for one-story baths) and 17 crowns (for baths with an attic).
- The partitions of the first floor are profiled timber of natural humidity with a section of 145x90 mm, straight profile. They cut into external walls with a depth of up to 30mm.
- Inter-crown insulation – jute fabric 6mm thick
- Inter-crown connection - on a metal dowel (construction nail 6x200mm, 250mm).
- Corner connection - “half a tree”. The outer corners of the log house are covered with clapboard (spruce/pine AB) 17*90 mm in two rows.
- An open terrace (if any) on supports made of planed timber with a cross-section of 100*150 mm, with shrinkage jacks. The fencing is a handrail made of planed timber with a cross-section of 40*100 mm filled with carved balusters. Steps at the entrance.
- The terrace floors are dry tongue-and-groove floorboards (spruce/pine AB) 36mm thick. They are attached with self-tapping screws to each board. The boards are laid in 5 mm increments.
- The terrace ceilings are lining (spruce/pine AB) 17*90 mm. Vapor barrier – NANOIZOL V.
- The clear ceiling height of the first floor (from floor to ceiling) is 2.10 m (+/- 50mm) for one-story bathhouses and 2.25 m (+/- 50mm) for bathhouses with an attic.
- The ceiling lining of the first floor (except for the steam room) is lining (spruce/pine AB) 12.8*88 mm. (joint for layout is allowed)
- The second floor is attic. Clear attic ceiling height (from floor to ceiling) – 2.20m
- Floor insulation – 100mm mineral wool KNAUF/URSA (or equivalent). Vapor barrier NANOIZOL V.
- The attic floors are dry tongue-and-groove floorboards (spruce/pine AB) 36mm thick. Every fifth board is fastened with self-tapping screws (for the possibility of re-upholstering the floors in the future).
- The cladding of the walls and ceiling of the attic is lining (spruce/pine AB) 12.5*88 mm (a joint for layout is allowed).
- Insulation of attic walls - 100mm basalt mats ROCKWOOL (or equivalent). Vapor barrier – NANOIZOL V.
- The attic partitions are a frame made of natural moisture timber with a cross-section of 40*75 mm, sheathed on both sides with clapboard (spruce/pine AB) 12.5*88 mm. The partitions are not insulated.
- Rafters - trusses made of natural moisture boards with a section of 150x40mm, 100x40mm. Installed in increments of 900-1000 mm.
- The gables are a frame made of natural moisture boards with a section of 150*40 mm, 100*40 mm. The external finishing of the gables is lining (spruce/pine AB) 17*90 mm. . Wind, moisture protection – NANOIZOL “A” (for baths with an attic).
- In the gables of one-story baths, a door (1 piece) and ventilation hatches (1 piece for each gable, under the ridge) are installed.
- Ventilation hatches are installed in the gables of bathhouses with an attic (3 pieces for each gable).
- The sheathing is a board of natural moisture with a cross-section of 22*100 mm, with a pitch of 300 mm. Counter-lattice - 20*40 mm slats, along the rafter slopes.
- Roof covering – ONDULIN (burgundy, brown, green) or galvanized corrugated sheeting. Under-roof vapor barrier – NANOIZOL S.
- Eaves and roof overhangs are 200 mm wide (for one-story baths) and 300 mm (for baths with an attic). The cornices and overhangs are hemmed with clapboard (spruce/pine AB) 17*90 mm.
- The staircase to the attic is single-flight, on strings made of planed timber with a cross-section of 145*90 mm. Floorboard steps. The handrail and fencing in the attic are planed timber with a cross-section of 40*100 mm.
- Finishing the walls and ceiling of the steam room - lining (aspen B) 14*90 mm (joint for layout is allowed). Reflective insulation on a foil base - NANOIZOL FB. Counter rail – 10*40 mm (ventilation gap – 10 mm). Before covering, the timber base of the walls is treated with a protective composition for baths and saunas NEOMID 200.
- Two-tier shelf made of planed boards (aspen B) 28*90 mm. Joint width – 40 cm (height – 50 cm); Lounger width – 60 cm (height – 110 cm).
- Installation of the ERMAK 12/ERMAK 16 stove with a hanging tank (stainless steel 35 l) for heating water.
- The base of the stove is brick in one row. Cutting the combustion portal - brick.
- Fire insulation - basalt cardboard, ceiling and roof passages, reflecting screen made of smooth galvanized steel on basalt cardboard, flush sheet.
- The chimney is vertical, with an outlet into the roof through the ceiling. Starting pipe - stainless steel 0.5 mm, stainless steel gate valve, stainless steel starting adapter, sandwich pipes 115 * 200 mm (stainless steel 0.5 mm * galvanized 0.5 mm), galvanized head.
- Installation in a washing room shower tray 800*800 mm with siphon. The drainage outlet beyond the perimeter of the bathhouse is a plumbing PVC pipe with a diameter of 50 mm.
- The windows are wooden, double glazed, with sealing and fittings (screw-in hinges, twist locks). Inward opening doors. Dimensions (h*w) 1200*1500 mm; 1200*1000 m; 1200*600 mm; 600*600 mm; 400*400 mm. Windows are installed in casing boxes.
- The entrance door is wooden, paneled, solid (spruce/pine A). Size (h*w) 1800*800 mm (for one-story baths; 2000*800 mm (for baths with an attic). Handles, hinges. On front door a padlock is installed.
- Interior doors – bath, frame (aspen A). Size (h*w) 1750*750 mm. Handles, hinges.
- Casing bars (swarms) are installed in window and door openings.
- Sealing of corners, joints, abutments - spruce/pine A/aspen AB plinth.
- Finishing of windows and doors – spruce/pine frame A on both sides, aspen AB
- Nails for fastening parts are black construction nails.
- Nails for fastening the lining – galvanized 2.5x50 mm
- Nails for fastening plinths, layouts - finishing galvanized 1.8x50 mm.
- Loading, delivery up to 400 km from Pestovo, Novgorod region, unloading of a set of material.
- Assembly of the bathhouse at the customer's site.
- BONUS. Accessories for the steam room. Stones – gabbro-diabase 40 kg.
We have compiled for you a convenient table of differences in the configurations of bathhouses for shrinkage and turnkey.
|
CONSTRUCTIVE |
SHRINKABLE |
FULL CONSTRUCTION |
|
Columnar foundation made of concrete blocks 200*200*400 |
Yes |
Yes |
|
Double strapping made of timber 150*100 mm |
Yes |
Yes |
|
Floor joists made of boards 40*150 per edge with a pitch of 600 mm |
Yes |
Yes |
|
Subfloor made of boards 22*100/150 mm |
No |
Yes |
|
Floor insulation with hydro and vapor barrier |
No |
Yes |
|
Finish floor – dry tongue-and-groove floorboard 36 mm |
No |
Yes |
|
Walls and partitions made of profiled timber of natural humidity with a cross-section of 145*90 mm (wall thickness – 90mm) |
Yes |
Yes |
|
Assembling a log house on steel dowels |
Yes |
Yes |
|
Corner connection - half a tree |
Yes |
Yes |
|
Intercrown insulation - jute |
Yes |
Yes |
|
Rafters - trusses made of timber 40*100/150 mm with a pitch of 900/1000 mm |
Yes |
Yes |
|
Lathing – board 20*100/150 mm |
Yes |
Yes |
|
Roof covering– ondulin / galvanized corrugated sheet C20 |
Yes |
Yes |
|
The eaves and roof overhangs are lined with spruce/pine AB clapboard |
Yes |
Yes |
|
Window and door openings with a dressing crown, without installing casing bars |
Yes |
No |
|
Window and door openings with installation of casing bars |
No |
Yes |
|
Installation of windows and doors |
No |
Yes |
|
Ceiling lining – spruce/pine lining AB |
No |
Yes |
|
Insulation + vapor barrier of floors/attics |
No |
Yes |
|
Finishing the walls and ceiling of the attic - spruce/pine lining AB |
No |
Yes |
|
Finishing the walls and ceiling of the steam room - aspen lining AB + shelves |
No |
Yes |
|
Installation of stove and chimney |
No |
Yes |
|
Installation of a shower tray 800*800 mm with a siphon in a washing room. Exiting the drain outside the perimeter of the bathhouse |
No |
Yes |
|
Stairs to the attic |
No |
Yes |
|
Finishing: plinth, platbands |
No |
Yes |
|
Loading a set of material, delivering it up to 400 km from our base, unloading at the customer’s site |
Yes |
Yes |
|
Name |
Cost, rub) |
Unit |
|
Construction of foundations on screw piles or reinforced concrete foundations |
8-921-930-69-80, |
|
|
Decorative finishing plinth - pick-up () |
1000-1600 |
linear meters |
|
Installation of reinforced concrete slabs 500*500*100 mm for support pedestals ( ) |
PC. |
|
|
Protection (backing board) of the first row of strapping made of larch boards 50*150 mm ( ) |
linear meters |
|
|
Protection (backing board) of the first row of strapping made of larch boards 50*200 mm ( ) |
linear meters |
|
|
Double strapping made of timber 150x150mm |
linear meters |
|
|
Double strapping made of timber 150x200mm |
linear meters |
|
|
Installation of floor joists made of timber 150x100mm |
linear meters |
|
|
Installation of floors from larch decking boards “corduroy” (for open terraces)() |
2000 |
m*2 floors |
|
Installation of finished floors from tongue-and-groove larch floorboards 27 mm ( ) |
2000 |
m*2 floors |
|
External walls made of profiled timber are moisture resistant with a section of 145x140mm, partitions are made of profiled timber. humidity section 145*90 mm |
2500 |
linear meters external walls |
|
External walls and partitions made of kiln-dried profiled timber with a cross-section of 145x90 mm |
2300 |
linear meters external walls And partitions |
|
External walls made of profiled kiln-drying timber with a cross-section of 145x140 mm, partitions made of profiled kiln-dried timber with a cross-section of 145x90 mm |
4000 |
linear meters of external walls |
|
The outer walls are made of profiled timber. humidity with a cross section of 145x190mm, partitions made of profiled timber. humidity section 145*90 mm |
4500 |
linear meters of external walls |
|
External walls are made of profiled chamber-drying timber with a section of 145x190 mm, partitions are made of profiled chamber-drying timber with a section of 145*90 mm. |
5300 |
linear meters of external walls |
|
Set of kiln-dried lumber ( ) |
1000 |
m*2 building area |
|
Pairing crowns with a wooden dowel |
1000 |
|
|
Assembling a log house using a SPRING UNIT FORCE ( ) |
2000 |
linear meters external walls and partitions of the log house |
|
Assembling a log house with the height of the crowns tied with steel studs |
1500 |
linear meters external walls and partitions of the log house |
|
Corner groove-tenon connection ( warm corner) |
6000 |
one corner of the log house |
|
Corner connection “into the bowl” ( ) |
from 30 000 |
house kit |
|
Interventional insulation – holofiber() |
300/450/600 |
linear meter external walls of the log house |
|
Increase in ceiling height by 14cm (+ one crown in the log house) |
500/750/1000 |
linear meters external walls and log partitions |
|
Insulation 150mm |
m*2 insulated area |
|
|
The construction of a staircase on strings made of laminated veneer lumber, with wide steps, turned pillars, balusters and a figured handrail. |
25000 |
PC. |
|
Roof covering – metal tiles RAL 3005,5005,6005,7004, 7024,8017) |
m*2 roof |
|
|
Roof covering – corrugated sheeting with polymer coating (RAL 3005,5005,6005,7004, 7024,8017) |
m*2 roof |
|
|
Installation of a drainage system (PVC, DEKE) |
1200 |
linear meters roof slope |
|
Installation of corner snow barriers ( ) |
linear meters roof slope |
|
|
Construction of tubular snow barriers ( ) |
1300 |
linear meters roof slope |
|
Attic structure: sparse flooring made of edged boards along the ceiling beams, a door in one of the gables + dormer window in the opposite gable |
m*2 ceiling |
|
|
External finishing of gables – house block spruce/pine AB 28*140 |
m*2 gable area |
|
|
External finishing of gables - imitation timber 18*140 mm |
m*2 gable area |
|
|
Treatment of the entire building with fire-bioprotective composition NEOMID ( ) |
m*2 building area |
|
|
Surface treatment with oil for terraces NEOMID ( ) |
m*2 floors |
|
|
Treating the walls and ceiling of the steam room and washing room with NEOMID varnish “for baths and saunas” ( ) |
m*2 walls and ceiling |
|
|
Treatment of the ends of the log house with NEOMID TOR PLUS ( ) |
opening/corner |
|
|
Treatment of shelves in the steam room with NEOMID oil ( ) |
1000 |
m*2 shelf |
|
Finishing walls and ceilings with washing clapboard made of larch 14*90mm ( ) |
1500 |
m*2 walls and ceiling |
|
Installation of a “leaky floor” in a washing room ( ) |
5000 |
m*2 floors |
|
Finishing with paired lining OSIN A, including shelves - OSIN A |
m*2 walls and ceiling |
|
|
Finishing with paired lining LIPA A, including shelves - LIPA A |
1200 |
m*2 walls and ceiling |
|
Finishing with paired lining LIPA EXTRA, including shelves - LIPA Extra more details more details) |
35 000 |
PC. |
|
Installation of PVC windows with single-chamber double-glazed windows |
from 4000 |
PC. |
|
Installation of PVC windows with double-glazed windows |
from 5000 |
PC. |
|
Installation of a heat exchanger in the ERMAK furnace, installation of a remote tank (stainless steel 60 l) on the washing room wall, hot water supply metal-plastic pipes |
20000 |
PC. |
|
Installation of a tank (stainless steel 50 l) on a pipe above the stove, with a tap leading to the washing room |
13 000 |
PC. |
|
Installation of another ERMAK furnace ( |
12 000/16000 |
set |
|
Chimney device made of stainless steel 0.8 mm thick (includes a protective screen and a stainless steel inlet sheet) |
16 000/20000 |
set |
|
Delivery over 400 km from Pestovo, Novgorod region. |
km |
|
Construction shed 2.0*3.0 / 4.0 m () |
from 21 000 |
PC. |
The whole country rests on such workers
Alexey Gennadievich!!!
Due to lack of time, I couldn’t write to you - thank you very much for the work of your employees in building the bathhouse, two young men, unfortunately, I don’t know their names, they worked clearly and harmoniously, the quality of the bathhouse is EXCELLENT!!! The whole country rests on such workers. All our friends and relatives also noted the impeccable work of the guys, which resulted in the bathhouse we dreamed of.
I would like to express my deep gratitude to Alexey (general director), Sergey Zorin and Vladimir Chistyakov (builders)! At the beginning of August, the guys built us a stunning bathhouse, taking into account all our wishes. The delivery of materials was carried out on time, the construction was completed even ahead of the time agreed upon earlier, the quality of materials and work was excellent top level. In general, just a fairy tale! I advise you to build only with Russian carpenters!
"Price quality"
The work is pleasing to the eye. Fast, high quality, on time.
![]()

I thank the team of guys (Evgeny, Dmitry, Sergey) and General Director Alexey Roslov for the work done.


I ordered a bathhouse with a 6x6 attic, project B-20, with minor changes, “for shrinkage.”
All work was completed ahead of schedule and with high quality. All my wishes were taken into account.
I was very pleased with Alexey Roslov’s attitude towards his work. He always promptly and competently answered all my questions and resolved controversial issues.
The team, despite the young age of the guys, worked quickly and smoothly, and at the end they gave advice on caring for the timber and preserving it for the winter.
Next year I will do the finishing with the same team. "Russian Carpenters" wins in all respects compared to other large companies. “Price-quality” is about them. Thank you very much again. I will recommend it to everyone.
The pleasant smell of wood creates a unique atmosphere in a beautiful two-story bathhouse, and coniferous wood also has a number of healing properties that have a beneficial effect on human well-being.
![]()
![]()
![]()
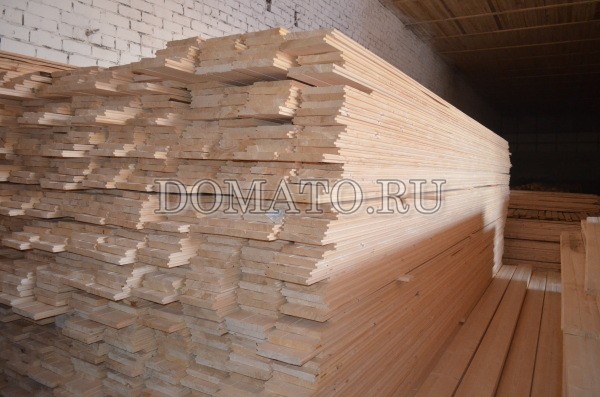
Profiled timber. When building our baths, we use only high-quality materials from our own production.
(click on photo to enlarge)


Joinery. The final stage of bath installation is Finishing work. Used as joinery wooden windows 1.2x1.0 (0.6x0.6 in the steam room). All windows are double, winter, glazed, with fittings. Wooden panel doors 2.0x0.8, metal entrance. It is possible to produce other sizes for the customer, as well as installation of plastic PVC windows,


Photo timber baths . During installation we use proven technologies, we build from scratch and “produce-ready”.


For wooden baths We use the following types of stoves for heating steam rooms in baths. We install the following models: Teplodar, Ermak, etc. We also install stoves with hobs in houses (baths). Some photos here. More details
When installing a stove in a steam room, we comply with building and fire safety regulations. It is possible to order lining (cutting) with furnace bricks. The finishing of the steam room according to the technology is aspen lining on foil, installation of shelves.


Technical description of a one-story bathhouse made of 6×6 timber
- 1. Foundation type: support-column
- 2. Material of main walls: profiled timber 150mmx100, 150x150, 150x200
- 3. Method of fastening the crowns: on metal dowels (nails 200mm), (on wooden dowels for an additional fee)
- 4. Cutting of corners is carried out: “into the floor of the tree” (“in a warm corner”, also known as tongue and groove, for an additional fee)
- 5. Inter-crown insulation: “jute”
- 6. Material of the “subfloor” and roof sheathing: material of the “subfloor” 20mm edged board, 20mm edged board sheathing with a pitch of no more than 400mm
- 7. Lag material and rafter system at home: logs made of timber 150mmx100 with a pitch of no more than 1.0 m, rafters 50mmx100 with a pitch of no more than 1.0 m.
- 8. Floor board and method of fastening: floor board (tongue and groove) 28mm fastened with nails. (floor board 36mm tongue and groove for additional fee)
- 9. Ceiling height: 1st floor - 2.35-2.4m (17 crowns), 2nd floor -2.3m.
- 10. Decoration Materials: gables, attics, ceilings and roof overhangs: softwood lining
- 11. Thermal insulation material “URSA” used: floor of the 1st floor - 100 mm, floor, ceiling, walls (entire attic) 50 mm.
- 12 Vapor barrier material used: “isospan” (layed on the floor, ceiling, walls)
- 13. Used waterproofing material: roofing felt (placed between the foundation and the lower crown)
- 14. Roof type: gable
- 15.Used roofing materials: ondulin (red, brown, green)
- 16. Carpentry: a) Door blocks: interior – paneled (2.0 x 0.8 m), metal entrance, with lock and peephole.
b) Window blocks: opening, double, glazed, with fittings (1.2x1m.), in a paired compartment (0.6x0.6m.)
- 17. Partitions: 1st floor - profiled timber 145x90mm, 2nd floor - frame-panel
- 18. The steam room is lined with aspen paneling on foil, shelves are installed
- 19. A change house for construction workers, 3*2 m, remains to the customer upon completion of construction (for an additional fee, supplied if there is no housing on the customer’s site for builders)
- 20. Generator for rent, customer’s fuel (supplied for an additional fee if there is no electricity at the customer’s site)
- 21. Installation of the furnace at the request of the customer for an additional fee. fee
Timber of natural humidity (atmospheric) drying (chamber drying timber (dry) for an additional fee)
A coniferous plinth is nailed to the joints of the corners of the walls and ceiling.
Note: Antiseptic treatment of the bottom frame and subfloors, casing in windows and doors, painting the outside of the house, delivery of change rooms and a generator for an additional fee. fee.
It is possible to replace the foundation, windows with PVC, increase the thickness of insulation, replace the roof with corrugated sheets, metal tiles, etc.
Delivery within a radius of 500 km from Pestovo (Novgorod region) is free.
- Additional services:
Double
into door and window openings
bottom trim and subfloors
one layer on the outside
under the roof
Assembly on
Dry