Very often, a trip to furniture stores is inconclusive. There is a way out in this case - a kitchen made of wood with your own hands. If you are not satisfied with the design, prices, materials of finished headsets, then this option is the only correct one. The method is not easy and will require an understanding of the process and a great desire. However, the result is worth it.
Consider the process of manufacturing kitchen furniture, as well as options for creating a do-it-yourself wooden dining set.

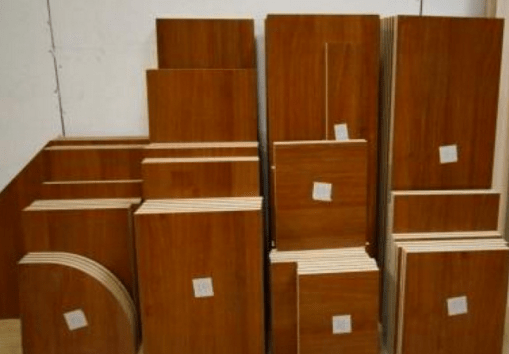
Wooden furniture fronts will look good in any kitchen
Choosing a kitchen set
Don't be under the illusion that everyone is good at crafting. This is a time-consuming process, and without building experience it will not be easy. Unless you have an incredible talent for it. In order not to waste money, practice on something small - build a shelf or a stool. If this is not enough for you, take hold of the dining table or bar counter.
With the choice of material in our time, no one should have problems. In hardware stores, chipboard, plywood, solid wood or veneer are in abundance. You can find them in the form of cut material or whole sheets.

Homemade bar counter
In the matter of a kitchen set, today it has become fashionable to make furniture from natural material or plywood, which has long ceased to be just an auxiliary element. The main trend of recent years is environmental friendliness. Therefore, from plywood, you can find both fireplace portals and cabinets. Many singled out such furniture, if not live, then at least in the photo.
As for natural wood, this is not a cheap pleasure. At the same time, even a family with an average income can afford a pine kitchen. Moreover, only the facade can be natural, and the rest of the furniture is made of chipboard.
DIY wooden kitchen: step by step
You can facilitate the process of creating a kitchen according to your preferences by ordering parts from a furniture company. Take over the functional frame by ordering canvases in the store. In the same place, you can arrange a cut in case of a mismatch in size. On the one hand, you got rid of some of the work that can be difficult to do yourself, on the other hand, such furniture will cost you much less than if you bought it in the salon. Write down all the necessary parts and accessories to avoid trouble during assembly. Decorate your furniture decorative elements- flutes, balusters and other overlays.

DIY wooden kitchen
A do-it-yourself kitchen made of wood from scratch involves a detailed drawing with dimensions, calculating the number of drawings, fittings, etc. Of course, it will be much easier to make a frame than facades. The fact is that side cuts require processing with special edges. All this can be found in the building departments.
Paneled facades will require wooden moldings, as well as decorative elements that will help you create an individual pattern.
Wooden countertops may have varied design. They are made from solid wood. Tabletops can be glued, prefabricated or resemble a shield of wooden plates. Solid countertops are an all expensive accessory for your kitchen. Therefore, for do-it-yourself wooden tabletops, it is better to choose either shields or prefabricated structures.
A chipboard countertop looks spectacular, but it is short-lived and prone to deformation. Also, veneer is not suitable for materials, since it does not tolerate washing and will peel off.
From a practical point of view, a natural wood countertop will look beautiful and last a long time. It is easy to process, resistant to sunlight, water and rarely scratches.

Kitchen cabinet assembly diagram
Furniture assembly schemes are simple on their own - adjust the level of the hanging cabinets. Attach the back wall to all types of shelves. If the shelf is open, keep the background subtle, but it will still make the furniture more solid. Attach hanging cabinets next to each other to create a more secure and functional structure. Many use screws and corners for this, but do not forget about dowels and glue. You will get a stronger connection.
If there are pipes (gas or ventilation) in the kitchen, provide cutouts in the furniture for them. If you connect fantasy, some pipes will easily close with false panels.
Summarizing
It takes a lot of creativity, time and effort to create a kitchen with your own hands. However, the pleasure received in the process is worth a lot. And the furniture will turn out absolutely unique. And you definitely won't meet her in any other apartment. Involve your relatives and children in creativity.
Fortunately, the Internet has all the necessary plans for this, including absolutely free ones.
But despite this, home master often stops the need to make paneled doors for cabinets, or in general their intricate design. And it's not even about experience and skill, but at least the availability of the necessary equipment.
The kitchen presented in this master class was made in Alaska, far from civilization and the bustle of the city. The masters were given the task of equipping the kitchen with furniture using edged board and plywood. Yes, so that it all looks stylish, beautiful and neat. The cost of materials was only $ 400 - for the inhabitants of this state the amount is not very significant.
In order to make kitchen furniture yourself at home, you will need:
Materials:
Pine board for the manufacture of the base of the furniture wall, as well as the facade panels of doors and drawers;
- high quality thick pine plywood;
- thinner plywood for the manufacture of the rear wall panel;
- boards of the first grade from hard and dense wood, such as ash, maple or oak for the manufacture of countertops;
- a ready-made concrete countertop or components to make it in case you do not want to use wood in this area;
- paint of a suitable shade (not enamel!);
- resistant varnish for woodworking;
- furniture fittings: handles for lockers and drawers, as well as furniture hinges;
- screws or self-tapping screws, nails;
- metal-plastic guides for drawers;
- glue for woodworking;
- primer on wood if necessary;
- metal connecting corners, if necessary;
- for the manufacture of concrete countertops: cement, water, fine river sand, dye, plasticizer or dishwashing detergent, varnish for stone and concrete.
Tools:
Circular saw or electric jigsaw;
- miter saw optional;
- grinder;
- electric drill;
- screwdriver;
- carpenter's hammer;
- sandpaper with fine grain;
- paint brushes and a roller with a plastic tray;
- construction tape measure and square;
- pencil;
- for the manufacture of concrete countertops: plywood form, trowel, construction mixer, construction packaging, grinding wheels for grinding concrete.
Step one: take measurements, draw up a diagram, detail the plan
Despite the fact that in this master class all dimensions are given and the design is described in detail, you still have to do some preparatory work.
First, take measurements of your own kitchen. Think about where the stove, refrigerator and sink will be located. Ideally, the most convenient option for you is when the stove is in one of the corners, and in the other there is a refrigerator. In this case, your entire wall will be a one-piece structure, and this is always more convenient than making each cabinet separately.
Sketch out a diagram on paper using the pre-made computer layouts from this master class, and indicate the general dimensions. After that, carefully disassemble the entire structure in detail and determine the exact size of each of them. At first glance, the task is long and tedious, but it is not. The wall consists of many parts of the same type, and such work will not take much time.
Please note that this kitchen wall was made from almost one plywood. Even the frame consists of sawn plywood strips. Only its base is assembled from a natural board. This is the fastest and most convenient way to make furniture at home. If you wish, you can replace plywood with natural wood in the manufacture of facade panels for cabinet doors and drawers.
Step Two: Determine the Basic Design Principles for Your Kitchen Wall
The highlight of the program was a common base of boards for the entire wall. You can see it in one of the photos below. This is an ordinary wooden frame designed to raise the furniture wall above the floor. The idea turned out to be successful for several reasons.:
- you do not need to calculate, mark and cut out the protrusions on the side parts of cabinets and partitions;
- plywood walls are shorter, which is very useful for the rational consumption of a plywood sheet;
- the lower part of the cabinet is solid and this adds a very noticeable rigidity to the wall;
- and finally, it is easier for you to build the frame, since the top section is simply attached to the base with screws.
In order for the kitchen wall to look complete and tidy, I planned the front frame frame, which looks like a single piece when assembled.
But the main feature was the author's idea at the expense of the design of the cabinet doors. Usage milling machine became impossible, so I had to come up with something simple, but no less spectacular, the paneled doors were unlived. So there were these easy-to-make doors that imitate drawers.


Step three: assembling the kitchen wall
Transfer the dimensions of the parts to the material and cut the plywood and boards into blanks. Already at this stage, you can grind all the planes that, after assembly, will be inside the cabinets and drawers.
To connect the wall elements, the author used inclined pocket holes with screws, as well as glue for woodworking. If you are sure that the back wall and sides of the structure will not be visible, pocket holes can be drilled from the outside.
Assemble the frame from the side walls, partitions and the base under the countertop. Collect also wooden frame grounds. and connect both parts with furniture screws and metal corners. Fasten the facade plywood frame to the front of the wall.
Make drawers according to the size of the upper cells. The drawers should be smaller and fit into the compartment with the clearance necessary to install metal-plastic guides for sliding systems.
Prepare cabinet doors as well. To do this, connect wide and narrow parts with plywood slats. All parts are placed with some clearance to simulate drawers. If you do not want the doors to have gaps, place thin plywood or fiberboard between the facade parts and the slats. You can also fill the gaps on the back with sealant or wood filler and then sand the surface.
Mount metal-plastic guides for drawers in the upper cells using self-tapping screws. Place the drawers in the cavities and make sure they open and close freely.
Hang cabinet doors. You can use hidden hinges, as the author did, or choose the right decorative hinges to your taste. Attach handles to drawers and cabinet doors.


Step three: making the countertop
As a working surface, you can choose a concrete or wooden base. Any of them is quite simple to make at home.
For a wooden base, use carefully planed and sanded hardwood boards. Adjust the parts so that there is no gap between them, and fix them on the base of the kitchen wall. To do this, use glue. Sand the surface until it looks like a monolithic base.
A concrete countertop is made from cement (usually white), water, fine river sand, plasticizer (or dishwashing detergent), and toner (dye). All components are mixed in the required proportion and in turn. Then the mass is placed in a plywood mold and subjected to processing on a vibrating table. The frozen workpiece is ground and fixed on the frame with glue.
Making a kitchen from wood with your own hands has several advantages. This solution will give you the opportunity to choose a kitchen of any configuration, layout and size. In our age of artificial materials, the use of natural wood in the manufacture of furniture has been significantly reduced due to its high cost, but, nevertheless, those who care about their health and about creating a cozy, elegant atmosphere in the house still prefer natural tree. This raw material has ecological cleanliness, strength, durability and, importantly, the external beauty of the natural texture. Wood lends itself well to processing, and therefore it is quite possible to make a kitchen with your own hands from wood, which will significantly reduce costs. In addition, some craftsmen make only facades from natural solid wood, and internal structures are assembled from chipboard or MDF, which also have many positive characteristics. This article will walk you through the main steps self assembly wooden kitchen in an apartment or private house.
Do-it-yourself natural wood kitchen: choice of material
Choosing the right material is no easy task. On modern market you can find more than 30 hard and soft rocks, they will turn out beautiful kitchen made of wood, handmade. Often a combination of these rocks is used due to the fact that hard varieties are more durable, but more difficult to process, while soft varieties have a lower margin of safety, but it is more convenient to cut small details from them. From this it follows that such hardwoods as oak, beech, walnut are best used for the manufacture of arrays and slabs, and soft ones - pine, poplar, cherry are well suited for decorating various shelves, cabinets, facades and individual decorative elements.
The choice of color is also important. Each type of wood has its own shade and the overall color palette is quite large, ranging from white-gray, which white ash has, to almost black wenge. The material for the facades must comply with the general color interior kitchen space. If the house where the furniture will be located is wooden in itself, a do-it-yourself wooden kitchen can be equipped in it (the photo successfully confirms this) with facades made of the same wood.
The manufacture of countertops will require special attention. If it is also supposed to be made of wood, it will need to be carefully treated with water-repellent agents. Experts still recommend making a custom-made countertop, for example, from artificial stone or other materials.
Having decided on the desired type of material from which a do-it-yourself wooden kitchen will be constructed, it is worth paying attention to the absence of cracks, knots and various layers in it when buying. The material must be of high quality.


How to make a kitchen with your own hands from wood: the tools you need for the job
In order to successfully design a kitchen set on your own, you need some skills in woodworking and using various tools. Beginners in this business should first try to make more simple designs, for example, a stool or a shelf. If there is self-confidence, we proceed to the selection of work accessories. Here you will need tools such as:
- measuring - tape measure and square;
- for material processing - a jigsaw, a hacksaw, a grinder or sandpaper, a vice and clamps;
- for alignment - building level;
- for processing holes - a drill with drills, a screwdriver, screwdrivers;
- stationery - pencil and eraser.
This is a list of the main tools used that will be needed in order to make a DIY kitchen out of wood. Additional ones may be required, but this is already determined individually.
DIY wood kitchens: project development
The main stage in the design of the kitchen is, of course, the drafting of the project. Initially, you need to measure the entire kitchen space, including various communications, protruding parts, windows, niches, if any. At the same time, it is necessary to take into account the possible curvature of the walls, therefore, the length of the walls, as a rule, is measured at three levels: the first - at the ceiling surface, the second - in the center, and the third - above the plinth. We transfer all the measurements obtained to a sheet of paper in the form of a drawing, it will serve to draw up a subsequent sketch.
When sketching a sketch, it is important to think through everything to the smallest detail. Since the kitchen is made of natural wood with your own hands, and not bought in the standard version, then it should be as convenient as possible for the owners themselves, accommodating all necessary furniture, given the location household appliances. The shape of the headset can be varied - decorated along one wall or be angular. In spacious rooms, mostly private houses, where there is a lot of space, they often equip a multifunctional table or island in the center of the kitchen, where a stove with a cutting table and a hood will be placed.
After the sketch is ready, it is necessary to separately draw up a detailed drawing of each piece of furniture with the marking of all parts - horizontal surfaces, plinth strips, drawers, fittings, etc. A very important nuance is the obligatory consideration of the thickness of the material itself, from which the kitchen will be assembled from wood with your own hands .
Based on the final drawings, the amount of material is calculated, which can also include various glass inserts (frosted or transparent), stained-glass windows or mirrors. Also, it's time to buy accessories - handles for lockers, hinges, brackets, etc.


DIY wood kitchen: assembly features
Having received the drawings, they need to be transferred to the canvas of the material, thus making original patterns. Having received all the components by sawing, experienced furniture makers advise sorting them and signing them so as not to get confused in the future and understand what to fasten with.
One of the important stages is the processing of blanks in order to improve their operational properties. This is especially true of the facades that will be in sight. They need to be sanded, polished, stained and opened with varnish or oil-wax impregnation. This will also greatly enhance the aesthetics, and a DIY wood kitchen will look very nice with accentuated wood patterns.

If all the sketches, drawings, tools, fittings and sawn structural elements are ready, you can start the assembly process. It begins, as a rule, with the assembly of the main frame-box with legs, in which shelves, guides are mounted, where drawers, doors are then inserted and handles are installed.
When the cabinets of the lower row are ready, we proceed to the upper tier. All suspended structures are mounted using a building level so that the curvature of the walls does not lead to incorrect installation. At the same time, they should be placed at a level convenient for the owners. Fasteners for hanging are installed on the boxes of upper cabinets or shelves. After installing the upper frame, doors and handles are attached to it.
The final stage will be the installation of a sink, stove, hood and various electrical appliances.


Do-it-yourself summer kitchen made of wood
Owners of private houses and country cottages often give preference to arranging an additional building separately from the residential building summer kitchen and it's pretty efficient. Here it is convenient to carry out the most labor-intensive processes that require good ventilation, for example, engage in various preparations for the winter.
Any preparation of a hot dish will entail the accumulation of steam, various aromas, and, sometimes, soot. In a separate house, where there is good ventilation, all these excesses of cooking are quickly eliminated. As a rule, the premises are built quite spacious and one of the best options his equipment will be a hand-crafted summer kitchen made of wood with his own hands.
Summer kitchens are open and closed. The open version assumes the presence of a foundation, supports and, possibly, one or two walls for protection from the wind like a gazebo, and the closed one is a full-fledged small house. Wood is a profitable material for construction, as it is plastic, environmentally friendly and can be processed well. Another advantage of using wood is its lightness, so the foundation under wooden structure you can make lightweight, for example, sand concrete blocks.
A do-it-yourself summer kitchen made of wood is a frame, built from a timber treated with special water-repellent oils, which is tightly laid and connected with nails. At the same time, internal joints must be fastened with large corners with long self-tapping screws - then the structure will be strong and stable.
Having built the frame, it is necessary to equip the floor surface, for which boards are used, which must also be treated with oil or wax to protect against the harmful effects of moisture and dirt. To save money, it is advisable to equip the kitchen floor under a tree with your own hands, using WPC (wood-polymer composite), which is boards made from a mixture of chopped wood with polymers.
The roof of the summer kitchen can be straight, single or gable, while the crate is made of processed boards. Any material, for example, a metal tile, is suitable as a coating. Between the crate and the coating it is worth laying a layer of roofing material, it will be a good safety net in case of heavy rains.
The walls are also sheathed with boards. An important point is the process of their perfect fit to one size, which is performed on a specially equipped machine. This is necessary in order to avoid gaps in the structure. The walls can be sheathed on both sides or only on the outside (the inside will have beautiful view due to the texture of natural wood treated with wax). Finishing materials can be wooden or plastic lining, fiberboard, blockhouses, etc. At the request of the owners, it does not hurt to pre-lay a layer of insulation between the frame and the finish.


In such a house, in addition to the main cooking area, you can install a folding dining table and gather in a friendly company until late autumn.


In conclusion, I would like to say that such material as wood has a very positive effect on human health. Its hygroscopicity creates a comfortable microclimate in the room with the required level of humidity, and a beautiful appearance always individual, thanks to the non-repeating pattern and texture created by nature itself. This is a durable material that allows you to use it not only for the manufacture of headsets, but also in construction. Natural wood furniture, wherever it is located, is always fashionable, prestigious and respectable.
Do-it-yourself wooden kitchens: material selection, development and assembly updated: September 28, 2017 by: Kyiv Irina
Each diligent owner, creating comfort in his home, strives to ensure that all the elements of the situation fit harmoniously into his interior, have maximum comfort and functionality and at the same time do not cost a fortune. A great way out is to create individual pieces of furniture yourself. This is how you can get the right option that satisfies all the aspirations of the household and allows you to seriously save. Taking into account that the kitchen is a place where the whole family spends a lot of time, every little thing is important here and making a kitchen set with your own hands is what you need. Particularly relevant homemade furniture for a small kitchen, because the standard options will not suit you.
Of course, for novice craftsmen, creating a home-made kitchen set is a very serious task, but quite solvable. To do this, however, you need to have minimal carpentry skills and really have a great desire.

In order to make this furniture without spending a lot of effort and nerves, and most importantly money, you will first need to create a design project and detailed drawings of the kitchen set. Drawings of kitchen furniture should include absolutely all sizes and take into account literally every detail.
Be sure to indicate where the stove or hob, refrigerator, sink, dishwasher and other kitchen electronics will be located. Firstly, the location of these items depends on communications, and secondly, when placing these elements, some rules must be taken into account. So, the refrigerator cannot stand next to the stove, there must be a cabinet between them, for an electric stove, as a rule, there is already an outlet, and the sink cannot be adjacent to either the stove or the refrigerator.

It is also necessary to take into account the dimensions of the facade elements of the headset. No matter how determined you are to do everything with your own hands, it is still preferable to order a kitchen facade. Only a real master can create a beautiful home-made furniture facade, and that's another story. We want to talk about the construction of the frame of a kitchen set with our own hands, and this, it should be noted, is perhaps the most important thing in creating multifunctional handmade kitchen furniture.

The question of how to make drawings and diagrams yourself will help to resolve modern programs that design cabinet furniture, for example PRO100.
So, the drawing of the headset has been worked out, the facades have been selected and ordered, let's proceed to the manufacture of kitchen furniture.
Necessary materials and tools
In order to assemble furniture for the kitchen with your own hands, you will need the following tools:
- jigsaw (if the material is cut independently);
- screwdriver (you can’t do without it);
- drill;
- level;
- hammer;
- roulette.

Approximate list necessary materials and fittings looks like this:
- laminated MDF or chipboard for the manufacture of cabinet side panels (material width 16 mm);
- Fiberboard for the back walls of drawers (width - 5 mm);
- material for the manufacture of countertops (chipboard with a width of 32 mm);
- sink (budget and durable option - a sink with a "beach" made of stainless steel);
- drying for dishes;
- shelf holders;
- rail for mounting upper cabinets and universal fasteners for them;
- cabinet handles;
- Euro ties, self-tapping screws;
- hinges for doors (regular or with closers);
- guides for drawers;
- legs for lower cabinets;
- and much more that is necessary specifically for your kitchen and what counters of hardware stores abound with.

Preparatory work
Before starting the assembly, it is necessary to prepare all the details of the headset. To do this, you need to cut them out of chipboard (or another material of your choice) with an electric jigsaw, sand the saw cuts with sandpaper, then use an iron to fix the melamine edge tape on each saw cut to protect the plate cavity from moisture and mold.
Important! When cutting the material, it is necessary to take into account the width of the saw (about 4 mm), and it is also desirable to base the plate. In other words, cut off 10-15 mm from the edges of the material. This is done in order to cut off uneven edges that could be damaged during transportation.
To take into account all dimensions and not make a mistake, it is recommended to draw a map of the cut of the slab. There are also special programs for its creation. If the scheme that you made yourself does not inspire confidence, then you can order it in the same place where you are going to buy the material. Such a scheme will help to avoid inaccuracies in cutting and take into account the width of the saw cut, which means it will save your nerves and money.

Usually sales companies building materials also carry out sawing and edging of workpieces from laminated chipboard. Note that the edge made of PVC or plastic, made at the factory, is significantly superior in terms of strength and durability to the one that can be made at home. Think about whether it is worth saving here.
Assembly of headset elements
The process of making furniture for your kitchen ends with the assembly of individual elements and the installation of the headset in its intended place.
When a set of finished parts is prepared in accordance with the dimensions, lay them out separately in the cabinets and in the order in which you intend to assemble them or in the places where the finished cabinets will be located, this will create order and help avoid confusion.

Assemble each cabinet in the following order:
- Attach the rails if the cabinet has drawers. Be sure to use the level, otherwise the result will be disastrous, and you simply will not open the locker.
- Drill holes for the shelf supports if the cabinet has shelves.
- Drill holes for fastening the walls to each other.
- Attach the vertical side panels to the bottom of the cabinet.
- Install the top part if it is separate, otherwise the cover is attached at the end.
- Attach the bottom cabinet legs.
After everything individual cabinets will be assembled, they can be mounted in places.
Installation
If the apartment has been renovated, then all construction work must be completed before the installation of the finished headset. If repairs have not been made, prepare the surfaces of the walls and floor of the kitchen for fixing furniture. If necessary, tile the area between the upper and lower cabinets of the headset. Can be used for an apron and laminated MDF.
Start mounting your headset from the bottom cabinets. Starting from the last, set them by level. This is important for installing countertops.
Fasten the cabinets to each other with euro ties.

Fix the common fiberboard back wall after all the cabinets are connected together.
Attach the countertop with pre-cut holes for the sink and stove or hob to the cabinets with self-tapping screws. Slices of holes for sinks and plates must be closed with building sealant. Do not spare him, he will protect the wood from moisture.
After that, proceed to the installation of the upper elements. The standard distance between the surface of the lower tables and the bottom of the upper ones is 650 cm. Add to this value the height of the upper cabinets and minus 10 mm for fastening. You will get the height of the mounting rail for installing the upper cabinets.
However, these are only standards, you can revise them, taking into account the individual characteristics of the room and the wishes of the household.

For fastening the upper cabinets to the rear walls, strengthen the universal canopies. Place the upper cabinets in place.
The last thing to do is attach the doors. Here you will need an assistant, because the doors are attached in the open position. Fix the hinge first on the door, and then fix it on the side of the cabinet. If it was not possible to agree with an assistant, you will have to sweat, but this is also doable.
Install built-in kitchen electronics. It's not enough to be a carpenter, you also need to be an electrician.
At the end, install accessories: dryers, roof rails, etc.
As you can see, making kitchen furniture with your own hands is not so difficult. The main thing is to put your soul and a little effort into its production. But the result will please you for a long time, and the money saved can be spent on arranging other rooms.
DIY wooden kitchen
We looked at how to make a kitchen set from chipboard or similar materials. But this is not the only option. For country house many people prefer to make a kitchen with their own hands from wood.

Wooden kitchen set fits perfectly into country interior. Natural materials are simply created for an atmosphere of unity with nature and relaxation from the bustle of the city.
A do-it-yourself solid wood kitchen involves the use of such diverse materials as oak, pine, cedar, poplar, cherry, acacia, walnut, beech, maple. Fascinating, isn't it? Just imagine the color palette and unlimited design possibilities. Here you can choose from budget materials and more expensive options.
For example, a pine kitchen is enough inexpensive option but it also has a lot of disadvantages. So, a set made of pine with your own hands is not as durable as the same one made of chipboard. Pine is a soft material, dents and traces of mechanical damage will often remain on it. In addition, pine wood does not have a pronounced pattern.

Important! Any natural material is always more whimsical in comparison with MDF or modern chipboard. It suffers more from moisture and does not tolerate direct sunlight (some breeds may change color during operation). Speaking about the environmental friendliness of the headset as a whole, it must be indicated that only facades will be made of natural material, and the frame will be made of more familiar and resistant laminated chipboard.
If you still want to create furniture using natural materials, pay attention to wooden shields. They can be made from pine, birch or oak. Such material is not characterized by the disadvantages of solid wood. It does not suffer from damage and is resistant to excess moisture. So the kitchen furniture panels do-it-yourself is a great option, not only save your finances, but also get an environmentally friendly and lasting result.
Another budget option for country house a kitchen set made of plywood can act. To build one, you need to carefully approach the selection of material. The created blanks will need to be treated first with a stain, and then with two layers of varnish. In this case, all sections of the material should be covered with sealant.

Do-it-yourself wooden kitchen is truly the work of a professional and a man who knows how to appreciate the charms of life. Do you need a detailed drawing of your dream kitchen set and suitable material. Whatever version of the material you choose for your kitchen, the main thing is that it suits your tastes and preferences, and you can create an excellent kitchen cabinet even from boards.
Assembling a kitchen set for teapots
Video instruction part 1.
Video instruction part 2.
Video instruction part 3.
When a person thinks about how to make furniture for the kitchen on his own, he will face a huge number of problems, because, without knowing the characteristics of various types of wood, it is difficult to create something worthwhile and durable.
Wooden kitchen furniture is quite expensive, so many men pick up a tool and make wooden kitchens with their own hands. The instructions below will introduce you to the basics of making furniture using a natural array.
Walkthrough
In order to make a kitchen set yourself, you must perform the following steps:
- We draw a plan for the future kitchen and indicate the following dimensions:
- The width and height of the walls;
- Dimensions of window gaps and piers.
In addition, the drawing must show detailed diagram utilities such as gas pipes, wiring, batteries, sockets and switches.
- After looking at the resulting picture, you need to determine what shape your new headset will be:
- U-shaped;
- L-shaped;
- Linear.
- The next step is to plan the design of the room and “arrange” (place on paper) everything in its place:
- Location of the washing section;
- Desktop;
- Gas stove;
- Place for food storage;
- Location of kitchen utensils and crockery.

Attention!
Washing machine, sink and dishwasher it is best to locate closer to the sewerage and drainage system. Gas stove, respectively, near gas pipes, etc.
- Now the most important thing is that do-it-yourself wooden kitchens need a detailed drawing and it is up to you to draw it up.
When marking, the following factors should be considered:- The distance from the kitchen countertop to the floor - this takes into account the height of the person who cooks most often. Also, don't forget about it. working hand- left or right.
- We indicate the dimensions of drawers, cabinets, tables, doors and wall cabinets.
Do not forget that in the drawing it is necessary to indicate the material from which the kitchen facades, frame and countertop will be made.
Also, as for the facades for the kitchen - display whether they are transparent or not, whether they will have mirrors or be decorated with carvings. The fittings must be marked in the quantity necessary for the complete assembly of the structure (handles, hinges, brackets, etc.).
Advice!
If you just don’t have enough of your own imagination to create a unique set, look at magazines - from the models you like, you can model your own furniture, adapted to the size of your kitchen.

Note!
If at one time you skipped drawing, then you should turn to a computer - there are many furniture programs on the Internet with which you can create not only a 2D model, but also a 3D one.
The most popular is the PRO-100 program.
- Taking into account all the dimensions obtained, we calculate the exact amount of material needed.
Do-it-yourself wooden kitchen requires a special approach, so we will try to select only high-quality and durable materials which even a beginner can easily handle.
Consider the most practical and available materials for the manufacture of a kitchen set:

Cutting of purchased material
In order to cut the purchased material evenly and as accurately as possible in size, it is best to contact the company. By the way, many companies supplying the material cut according to the dimensions you specified, make holes and surround the edges - in general, they do all the hard work for you. You only need to pick up the prepared material and assemble it in your kitchen.
In general, cutting material is an inexpensive service, so if you have the opportunity to use it, do not spare money. At the end, you will save a lot of time and money, having at your disposal perfectly fitted parts.
Necessary tool for creating a wooden kitchen:
- Screwdriver and drill with a set of drills and bits;
- Nails and hammer;
- Pencil, square and tape measure;
- Construction level;
- You will need a jigsaw if you will cut the material yourself;
- Wood saw (required for processing small parts and shortcomings)
- Sandpaper and a construction knife.
In general, kitchen furniture consists of only three types of products: wall-mounted and floor cabinets with doors and shelves, and a work surface. The only difference is their design and quantity.
Summing up

That's basically all you need to know a novice carpenter. We hope that now you understand how to make a kitchen with your own hands from wood and you have no doubts about your decision. If you still have questions, then especially for you we have prepared a thematic photo and video material in which you will find answers to your questions.
It remains only to recall the main thing - after the complete assembly of your new headset, you will have to disassemble it in order to paint the surface and varnish it. After processing and drying of all components, the kitchen is assembled again and installed in a place previously designated for it.