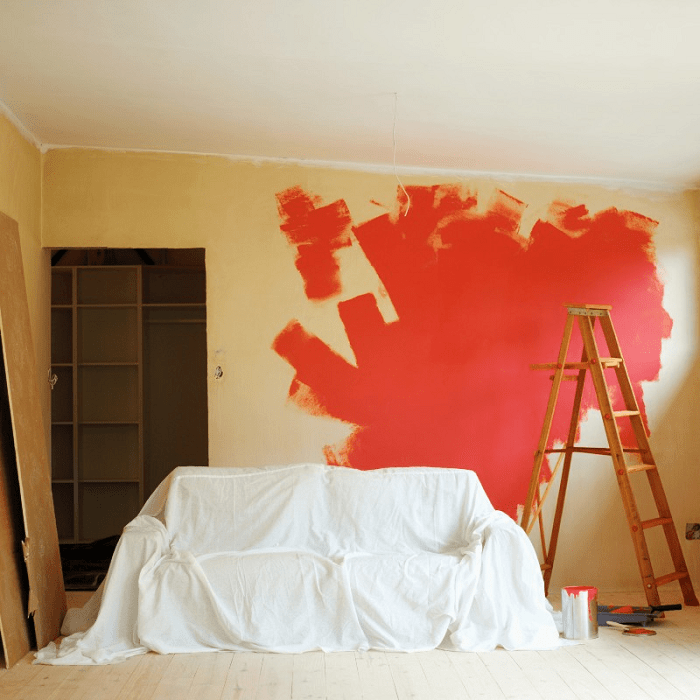
Renovating an apartment is now an expensive proposition. Some save for it for years, while others give away their last savings and end up in a debt hole. Regardless of their financial situation, everyone tries to save money, but in practice not everyone succeeds in doing this. Let’s look at which materials you can save on and which ones you shouldn’t, and we’ll learn to expose hired repairmen who are trying to profit from the owners’ ignorance.
Different types of repairs - how much to pay a technician and how to save?
The final estimate will depend on the type, size of the room and complexity of the renovation. There are three types of repairs: cosmetic, major and European-quality repairs. The cosmetic option is the most economical. This repair usually includes painting, wallpapering, and floor sanding. Such work can be easily done with your own hands, saving on calling a specialist. If you lack some specialized tool, it is not worth purchasing it for one-time purposes. Rent it. Make a preliminary estimate for repairs in order to adjust it in advance and select cheaper options. If you decide to hire a private specialist, redecorating your apartment will cost you, on average, 1,500 rubles per 1 m2, and through a construction company - 2–2.5 times more expensive.
Carrying out major repairs yourself is much more difficult, since many of the works require special skills and abilities. Stages of such repairs: floor screed, wall leveling, demolition and installation of partitions, dismantling of old coating and finishing, complete replacement water pipes, plumbing and electrical wiring, replacement of windows, doors, garbage removal. Price for calling a specialist during overhaul increases to 6000–15000 rubles per 1 m2. And this does not include the cost of consumables.
Here are four tips to help you save on major renovations:
- 1. Remove old wallpaper, tiles, dismantle flooring, clean up and take out the garbage yourself. Such work does not require special skills and tools, and the savings are significant - 5000–8000 per 1 m2.
- 2. Do not rush to spend money on finishing an expensive ceiling. Just level it and paint it with inexpensive chalk paint. When you have money, cover the ceiling with plasterboard or make a suspended ceiling.
- 3. Do not remove the plaster completely. Remove it only in those places where it peels off. However, take into account the peculiarities of the finish. If you plan to stick photo wallpaper, the surface must be perfectly flat. You may need to completely replace the plaster; in this case, you won’t be able to save money.
- 4. In order not to waste time on paperwork and extra money for garbage removal, collect the waste in bags and send it for storage in the basement, barn, or leave it on the staircase in a specially designated place, there is one provided. Throw a bag into a common trash container every day; there is nothing illegal about this.
European-quality renovation is practically no different from major renovation. The cost increases due to the purchase of expensive and natural materials from famous manufacturers. The price of materials is automatically reflected in the cost of the master’s work, which starts from 25,000 rubles per 1 m 2. .
How to check the honesty of the estimate - common tricks
If you decide to involve an experienced team of repairmen in the repair, be prepared that you may be deceived. To check this for sure, pay attention to several important features. The information will be useful for both beginners and experienced homeowners who have decided to start a renovation.
To determine the exact costs of repair work, the foreman measures the parameters of your room with his tape measure. It seems that everything is fine and there can be no catch. In this case, we recommend providing your own tape measure for measurements. Often, cunning repairmen cut the tape measure, for example, by 50 cm, and fasten it to another part of the tape, retreating 20–30 cm or more. From the actual size, for example, 2 m, your room increases to 2.3 m and, accordingly, the price increases, because the cost of work is calculated per 1 m 2.
When receiving an estimate, carefully review all items. Often repairmen duplicate the cost of services under the guise of other work. For example, leveling walls - preparing walls for wallpaper. Read each item carefully so as not to overpay.
Please note the price per 1 m2. Compare it with others first construction companies and private individuals. Prices below average should alert you. Usually, during the process, the repairmen who initially offered you a low price raise it and ask you to pay extra for additional services. The owner finds himself in a dead end, since the work is already in progress, and the estimate automatically increases by 2-3 times.
Saving materials and increasing the cost of work is another technique used by dishonest repairmen. For example, they can put a 1 cm layer of plaster on you at a cost of 3–4 cm, reducing the planned laying path electrical cables or plumbing pipes, and take the remaining material for yourself. In fact, you are overpaying for material that does not “work” for you. To avoid such mistakes when performing turnkey repairs, ask the repairmen to photograph the completed work process in detail step by step and send it to you by email.
If you decide to install heated flooring, remember that it is not placed around the entire perimeter of the room. An unscrupulous foreman will offer you to put a heated floor under furniture where it is absolutely not needed, which will also increase the cost of the project.
Complete replacement of wiring is another service that almost every foreman will offer you without making sure that you really need it. You can make good money on old copper and aluminum wiring.
And the last piece of advice: purchase the materials yourself, do not trust this matter to the repair team. As a rule, they buy building materials on the market, where the storage conditions for many goods do not meet the standards. In addition, repairmen there can ask for a blank check with a stamp and enter a list of goods and their cost with a markup.
In what season will repairs cost less - promotions and special offers
It is better to start repairs in the off-season - in early or mid-autumn. This period is suitable for carrying out both external and internal repair work. It’s still warm outside, and prices for building materials are gradually decreasing for the winter season. Savings on summer goods reach 15–20% without loss of quality. Therefore, if you were planning to spend 250,000 rubles on renovating a room, know that in the fall and winter you can save about 30,000 rubles, which can be spent on renovating the hallway.

Promotions and special offers are a special type of service where you can save money. Pay attention to illiquid items. They have a limited shelf life and will not last until next season. Construction stores offer good discounts on such products. If you are going to do repairs right now, take a closer look at putty, plaster, glue, and sealant at a bargain price, below the market average.
Budget options for replacing plumbing fixtures
Replacing plumbing affects a significant part of the renovation budget. If it is in good condition, without chips, cracks, and only the surface with an old coating makes you think about dismantling it, we advise you to clean and restore the plumbing. Dear detergents We replace it with a mixture of baking soda and vinegar, which destroys stubborn plaque well. Budget transformation option - . You can cover the bathtub yourself with enamel, liquid acrylic, or order an acrylic liner to fit the dimensions of your plumbing fixtures. Restoration will reduce the cost of purchasing a new bathtub by approximately 4 times and, depending on the chosen option, will extend its service life old bath from 5 to 20 years.
If you nevertheless decide to change your plumbing, consider the budget option of purchasing from so-called landfill entrepreneurs. Often, when moving into a new house, owners change earthenware and cast iron plumbing fixtures that are in good condition and throw them into a landfill. Resourceful businessmen have come up with an easy way to quickly and easily make money from this. They take plumbing fixtures in good condition from the landfill, wash them and put them in order. They do not directly expose their contacts, working on the principle of word of mouth. In the subsidiary warehouse of such entrepreneurs, you can select suitable plumbing fixtures and save a third or even half of the factory cost.
Economical wall covering and flooring in dry and wet rooms
To save money when covering walls, we advise you to buy not edged (planed) lumber, but slab (wood sawing waste). Croaker is sold raw and does not match the quality of conventional materials. This can be easily corrected if you purchase it in advance in March-April and keep it in a dry room until autumn. In addition, slab cladding saves money on leveling the walls. In 80% of cases, it completely hides all irregularities. The option of covering the walls with waist-high slabs and covering the walls to the ceiling with non-woven wallpaper will help not only save money, but also make wall decoration practical. The lower part is resistant to wear and contamination, and the upper part complements the overall picture.
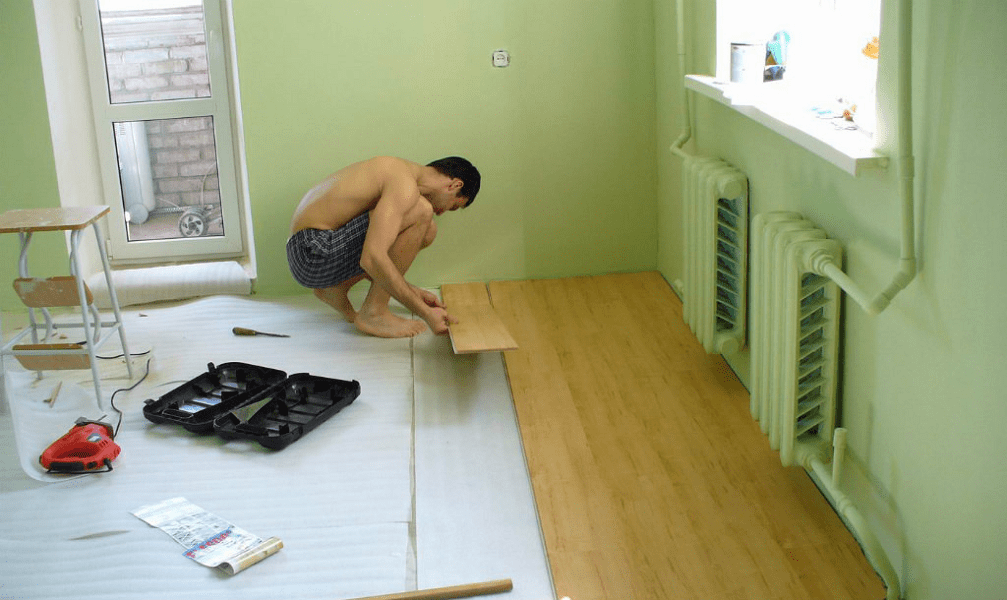
The most budget-friendly option for laying floors in dry rooms is marmoleum. This material requires leveling the floor only in 10% of cases. However, for rooms with high humidity (bathrooms) marmoleum is not suitable; you will have to lay classic tiles. An alternative to marmoleum is laminate. This option is also inexpensive, looks beautiful and is suitable for installation under plank floors. True, the floor will have to be leveled.
To decorate the walls in the bathroom, choose laminated hardboard. This material is less familiar than tiles, but cheaper. It is better to cover the ceiling with plastic panels. Don't skimp on waterproofing. The money spent on it will pay off and extend the service life of even the cheapest finishing materials. Instead of gypsum plaster, use a cement-plaster mixture to level the walls. It is not inferior in quality and is cheaper. When deciding to lay tiles on the walls and floors, buy a plain finish. Such tiles do not need to be frequently adjusted and matched to the pattern; less material is required, which is automatically reflected in the purchase cost.
What is better not to save on, so as not to pay twice later?
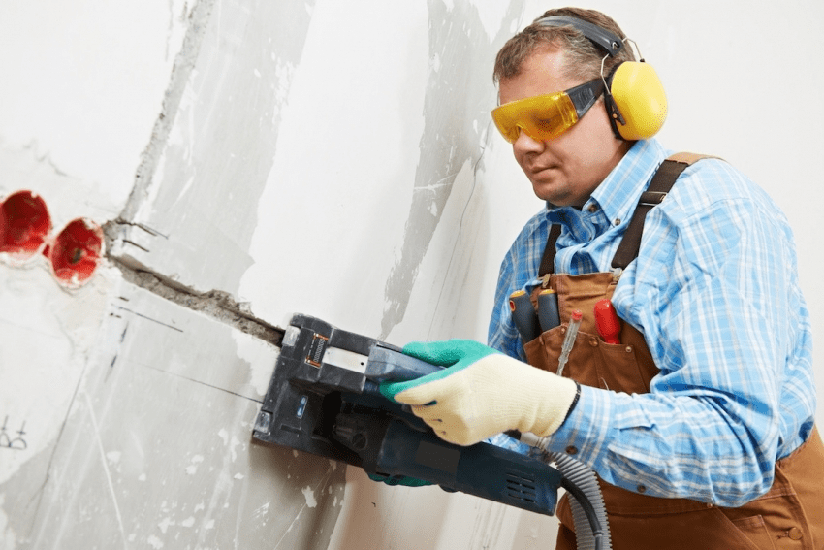
When carrying out major and European-quality repairs, it is impossible to do without replacing the electrical wiring. It is better not to save money on this event and entrust the work to a professional. It is especially important to pay attention to Soviet wiring due to its high power modern devices, which sometimes the old cable cannot withstand. During the replacement, you will have to use a wall chaser to properly lay out the new wiring. Workers charge from 100 rubles per 1 m2 for this service.
Complete replacement of wiring in a two-room apartment, on average, will cost 40,000 rubles. A private specialist may charge less, but he does not provide a guarantee for installation, so if malfunctions occur, you will have to pay the specialist again for the work. To save money, we advise you to contact an electrician from DEZ. Such a specialist performs the work slowly depending on his workload, but the quality and guarantee of service are an undoubted advantage of choosing this particular specialist. But you can install sockets and switches yourself.

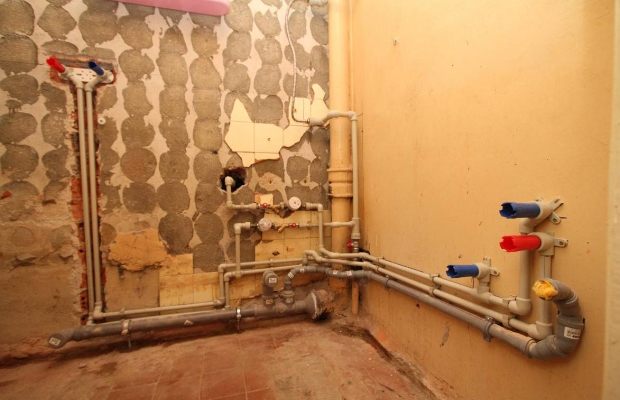
Another job for which you need to involve a specialist and not save money: replacing plumbing pipes. Choose your own consumables according to your budget. Hiring a plumber will cost, on average, 15,000–20,000 rubles. If you do not have experience in connecting plumbing, we also recommend that you seek help from a specialist.
Repair is not only expensive, but also time-consuming. Sometimes it is possible to remodel the interior of an apartment using cosmetic renovations, which are much cheaper than major renovations. But, if there are no other options, you have to do a full renovation.
Where to start a major apartment renovation so that it doesn’t turn into a long “epic”? After all, many people literally live in a state of renovation for years, trying to turn their apartment into a more comfortable and beautiful home. It is very difficult to make major repairs on your own, and not all people will be able to cope with such a task. However, nothing is impossible. In a matter such as a major overhaul, you need to follow the correct procedure; only in this case will you be able to achieve an excellent result in a short time.
Apartment overhaul plan
There is no point in starting a major overhaul without a clear, well-thought-out plan. You should not only have a good idea of what your apartment will look like after renovation, but also visualize your dream. It is best to develop a 3D project, but you can get by with a simpler diagram. First you need measure the entire apartment. You shouldn’t trust the technical plan of the room; you need the real parameters of the room. One centimeter can make an incredibly important difference. For example, ordered furniture may simply not fit in the required place. To avoid such situations, carefully measure all walls, openings, and distances.

Write down your results and, based on them, draw a floor plan on a scale convenient for you. Then you will need to decide on the zones (bedroom, living room, dining area) and distribute the furniture. Only after this will you be able to evaluate your idea, see its advantages and disadvantages.
If you are satisfied with the result obtained, then you can proceed to the second phase of planning. To do this you need to carefully think over communications. Electricity must be supplied to the refrigerator, computer, and TV. Take care of lamps and switches. The latter should be located in convenient places. If you do not distribute the furniture first, then after the renovation is completed, the switch may end up, for example, behind a sofa or closet.
The plan is ready, checked and rechecked, now you can start repairing.
Dismantling during major renovation of an apartment

First of all, you need to get rid of the previous repairs. Disassemble and remove furniture, tear off old wallpaper, remove linoleum or laminate. If you were planning a redevelopment, then start demolishing unnecessary walls. At this stage, it is important to think about removing construction waste. There will be a lot of it. Usually from one two-room apartment They carry out the “waste” onto two trucks.

Agree with workers or use the services of special companies to quickly get rid of garbage. You shouldn’t put it in front of the entrance, as this can lead to quarrels with neighbors.
Preparatory work for a major renovation of an apartment

Everything unnecessary has been removed, the walls have been demolished and cleared of old renovations. It's time to do the grunt work. If you also dismantled the screed, you need to make a new one. At this stage, the windows, glazing or loggia are replaced. Conduct all communications according to plan. Make 2-3 spare sockets, they may come in handy. Sockets located in inconspicuous places will help you avoid the need for extension cords, which noticeably spoil the interior of the apartment.
Once you have done the electrical, plumbing and heating wiring, you can begin preparing the walls. Plaster them and level them. The same process will be required for the ceiling, and in some cases for the floor. This completes the draft stage.
Let's start finishing work

The ceiling is finished first. You can simply paint it, wallpaper it, or install a suspended/suspended ceiling. The main rule of repair is to move from top to bottom, this way you will protect your repair from contamination, and yourself from extra work. If you start finishing the room from the walls, there is a risk of staining them while finishing the ceiling. That is why first finish all the work in the upper part of the apartment. After this, you can begin finishing the walls and floor. If you are gluing wallpaper or painting walls, first remove installed sockets and switches. After the tiles in the bathroom are laid, install and connect the toilet, bathtub or shower, and sink. Don't forget about the special connections for the washing machine and dishwasher.

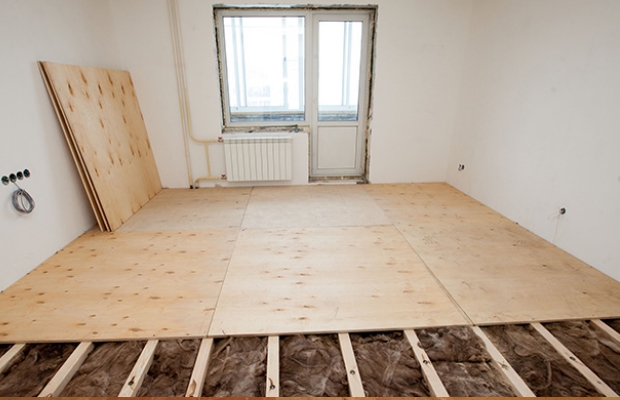
Floor preparation depends on the material used. You can choose, for example, between . For example, many people think that laminate can hide uneven floors. However, the height difference in one area should not exceed five millimeters, otherwise you risk not only the beauty of the laminate, but also your peace of mind. The fact is that laminate can crack and will definitely creak.
It is better to protect yourself from problems and adjust the floors using special solutions that independently take shape and level the floor ().
Who can you trust with major apartment repairs?

Separately, it is worth noting the fact that construction crews work as a well-coordinated team of specialists. They can install doors, lay tiles and wallpaper at the same time. If you use the services of professionals, then, of course, the repair will be completed quite quickly. But the cost of repairs will also increase significantly. Doing major repairs yourself is not an easy task; it will definitely take up not only your time, but also your energy. Many apartment owners make a “compromise” by hiring a crew for rough work. They do all the rest of the finishing themselves. In this case, you can complete the repair faster, but spend less money.

Everyone chooses for themselves what is more important to them - money or time. However, we advise you not to skimp on work and materials; redoing a renovation is much more expensive than doing it right from the very beginning.
Most happy owners of apartments on the secondary market are concerned about the arrangement of their property. Before you start repairs, you need to decide on its scale. Some secondary housing only needs cosmetic updating.
But it happens that a major overhaul of secondary housing is required with the replacement of all communications. If you do all the work yourself, you will get good savings. Before you start remodeling, you need to decide what work will be performed and where to start the repair.
Types and types of repairs

Here the following stages usually take place::
- Coordination of premises redevelopment.
- Replacement of electrical wiring, sockets, installation additional lighting. Replacement of water supply and drainage pipes, as well as plumbing fixtures. Heating system update.
- Replacement window frames, interior and entrance doors.
- Carrying out the necessary additional work before finishing the walls, floors, and ceilings.
- Replacement of old finishing materials.
- Installation of built-in furniture and appliances, if provided.
Cosmetic repairs

May limit itself only to changing finishing materials on the walls, floor and ceiling, based on a ready-made design project. But before such a replacement, it is necessary to thoroughly prepare the surfaces.
There are three reasons for this:
- So that new decorative coatings do not fall off along with the old putty or plaster.
- To make new ones finishing materials did not deteriorate while working with them.
- So that the chosen finish looks properly.
Counting expenses

To ensure that the work does not end prematurely due to lack of material support, it is necessary to correctly calculate the upcoming expenses. Depending on what you are going to repair, the necessary measurements of the room are taken.
Knowing the dimensions of the room, you can make any calculation. Then, in specialized stores, prices of the items of interest are monitored. building materials. It is worth making a separate expense column for kitchen renovations if built-in appliances are installed.
Which room to start renovating an apartment from?

It is better to update several rooms in stages, starting with the furthest one. This way you can avoid excess dirt that is formed from construction waste. This sequence will also help solve the problem associated with emptying the room being renovated from furniture.
Where to start renovating a kitchen - by drawing up a design project. He will show you exactly where to place sockets with switches, where to route the pipes, and at what height the apron should be laid out working area. Therefore, it is better to do a kitchen renovation step by step, based on the design.
Sequence of room repairs
In order for the renovation of the apartment to proceed smoothly, it is necessary to follow a certain sequence.

- Dismantling works
The beginning of a major overhaul begins with dismantling work. Old finishing materials are removed from walls, floors, and ceilings. If necessary, openings are changed and unnecessary partitions are demolished.
Carrying out repairs studio apartment, it is better to dismantle it in all rooms at once - in the room, in the kitchen, in the bathroom with toilet and in the corridor.
This will save you money on garbage disposal. If the renovation is of a two-room apartment or more, then dismantling can be done one by one, in the order in which rooms will be renovated.

- Surface preparation
After dismantling, the result was an apartment without finishing. In the empty “box” the electrical supply system is replaced, all openings are prepared, new additional partitions are erected and the walls are plastered. Water supply pipes, sewerage pipes, heated towel rails and heating radiators are being replaced.
You need to pay close attention to the water supply and electrical systems when renovating your kitchen and bathroom.

- Alignment of walls and ceiling
Once all the electrical wires and pipes are hidden in special grooves, the walls are aligned with the ceiling by plastering and puttying. It's worth starting from the ceiling. The evenness of surfaces is checked with a level.

- Ceiling repair
The leveled ceiling can be painted, wallpapered, or suspended. It all depends on the design of the room.
The kitchen or bathroom ceiling must be made so that large condensation does not form on it. Otherwise, mold will form in the future.

- Replacement of windows and doors
When replacing windows, all cracks must be carefully insulated or filled polyurethane foam. Then the window sill, slopes, and ebbs are installed outside. During the entire process, it is necessary to ensure that the installation is even. This is necessary to ensure that the window does not warp during operation.
It is better not to remove the protective film from the windows until the repair work is completed. Door frames are usually easy to install. The main thing is that everything is level.

- Floor repair
After work on the ceiling and walls is completed, you can begin to work on the floor. When renovating a three-room apartment, furniture and things can be moved to the new floor only after the baseboards have been installed.
The old covering is removed from the floor and a leveling screed is made. Only after the floor is level over the entire surface can you begin laying decorative materials.

- Bathroom and toilet renovations
When repairing a bathtub with a toilet, you should pay special attention to the tightness installed pipes and water supplies to plumbing fixtures.
Decorative coverings that are not afraid of moisture are chosen for such rooms. A new bath, shower, toilet and bidet are being installed. In rare cases, the bathtub enamel is restored.
Expert advice on how to avoid mistakes during repairs
- When purchasing materials, it is necessary to make a small reserve to avoid shortages during repairs.
- So that work doesn’t get stuck, it’s worth preparing everything necessary tools in advance.
- The dust will settle much faster if you spray water with a spray bottle during dismantling or gating.
- Demolished partitions should not be load-bearing walls, since their dismantling is strictly prohibited. Especially if it is a panel house.
How to renovate an apartment
First of all, decide what kind of repair you need: cosmetic or major. Quite often it happens that the desire to re-stick wallpaper entails replacing doors, baseboards, ceiling trim, etc., which leads to much higher costs, disruption correct sequence works and repeated alterations. Major repairs require careful planning, strict adherence to the technological process and large material investments. Decide on the future interior. Based on your financial capabilities, you can do the project yourself, or invite experienced designer. In the first option, you will have to completely focus on your taste in choosing wallpaper, tiles, flooring, etc., and also independently calculate the required volume and quantity of materials. A specialist will help you choose the right ones color solutions, modern finishing materials and stylish accessories in accordance with fashion trends, however, such a project will not be cheap. Be sure to make a rough estimate based on the design project and available financial resources. Then compare the cost of materials in construction stores, markets, home goods hypermarkets and choose the best offers. Based on this data, adjust the estimate and evaluate your material base. You may have to take out a loan or make changes to the project if it turns out to be too expensive. When planning expenses, it is necessary to take into account who will carry out the renovation of the apartment: on their own or with the help of hired workers. Some types of work that do not require special preparation can be done independently, for example, hanging wallpaper, laying tiles, whitewashing the ceiling. But such activities as replacing electrical wiring, installing plumbing, leveling floors and walls, installing doors and windows, etc. are best left to specialists. If you decide to hire a contractor for repairs, study the offers on the market for construction and finishing works and services, read reviews on the Internet and choose a contractor that has proven itself in the best possible way. Don't go cheap: a low price can mean adequate quality. Also, do not trust companies that promise to make repairs in a short time, since it is very likely that the speed in this case indicates a disregard for building rules and regulations and a violation of technology, and this will entail the need for redoing. Relying only on your own strength to carry out repairs, draw up a clear plan and determine the sequence of work. In particular, it is advisable to update the bathroom and toilet first, and the hallway and balcony last. When doing a major renovation, start by replacing electrical wiring and heating radiators, then level the walls and floor, install new doors and windows. Next - finishing the ceiling, laying the floor, wallpapering or painting the walls. Renovating an apartment is a difficult and troublesome task. But if you have a goal, a firm intention and a concrete plan, success is guaranteed. The main thing is not to deviate from the intended path and not to stretch out the renovation of the interior for years.
The issue of renovating a room almost always depends on the budget for future work. Most often, the owners of an apartment or house are faced with a choice - to renovate the room with their own hands in a cosmetic way, without putting the matter off for a long time, or to plan a major overhaul for the indefinite future with redevelopment and a serious update of the design. Most craftsmen in such a situation recommend redecorating the room, during which the vast majority of problems with the interior of the room can be solved.
How to properly approach the organization of renovation in one room
Starting a room renovation is always inconvenient and even scary, especially if you don’t have enough experience, and the only assistants at hand are a cheat sheet on how to renovate a room with your own hands for beginners. But, as a rule, uncertainty and doubts pass when the scope of future work becomes clear and the question of in what sequence to make repairs in the room is resolved.
Therefore, the first step is to draw up a master plan for cosmetic repairs, and most importantly, before attempting to make repairs in a room, it is necessary to draw up a detailed estimate for the purchased materials and consumables. This prerequisite, even for renovations in a small room you will need to make a list of several dozen items.

Where to start renovating a room is not important; you can carry out repair work in the sequence that seems more convenient in given specific conditions. Traditionally, renovating a room with your own hands begins with the most “dirty” or rough work and ends with delicate finishing procedures.
A typical list of work or sequence of repairs in a room is as follows:
- The old finish is removed from the walls, ceiling and floor. Removing the floor covering produces the largest percentage of dust and dirt, so it is removed first;
- Rough preparation of the floor is carried out for further laying of a new floor covering;
- Wiring repairs are carried out, lamps and switches are moved and hung, corrugations are laid out for television and Internet cables;
- The walls and ceiling are cleaned and puttied. If your redecoration plans involve changing the wallpaper to a more modern type of finish, you will need to level the walls gypsum plaster;
- The ceiling surface is leveled in a similar way. Before whitewashing or painting with water-based emulsion, the ceiling is rubbed down, plastered with a lime-gypsum mixture and a decorative coating is laid;
- In progress decorative finishing walls, ceiling plinths are glued, cladding is changed interior doors;
- New flooring is being laid, baseboards are being installed, lamps are being hung, and switches are being installed.
Of course, at each stage of room renovation, photo, a large amount of debris and dust will be generated. Not only will you have to regularly clean the room and remove rubbish rubble, you will also need to try to cover areas with already completed repairs with protective plastic film to avoid dust on the surface.

What Shouldn't Be Included in a Room Redecoration
Finishers often call cosmetic repairs a “three-day job”; in order to update the interior of a room, as a rule, no more is required. The list of repair activities does not include the most expensive work:
- Redevelopment of premises with the transfer of interior partitions;
- Replacing the heating system;
- Installation of expensive multi-tiered suspended ceilings;
- Glazing of the balcony and replacement of windows with double-glazed windows;
- Equipment for heated floors in the room.
It is clear that all of the above components of repair require serious financial costs and the involvement of qualified specialists in the work. It will take more than a day or two to carry out such serious events. In addition, such is the specificity of the renovation in the room that, willy-nilly, dust and construction debris spread throughout the apartment. Therefore, the situation is regulated in this way - either cosmetic repairs are made in a single room, or the entire apartment is “stood up” for major repair work.
In general, the redecoration plan includes everything that can be done in a couple of days with my own hands for relatively little money.

The main task of cosmetic repairs
The main goal of renovation work is to refresh the interior of the room, remove minor defects and damage that have accumulated over the years, which are incredibly annoying and interfere with everyday life.
In rare cases, cosmetic repairs become a consequence of force majeure circumstances, for example, flooding of a room by neighbors on the floor above or preparing the premises for renting. There may be many reasons, but the main thing is still maintaining the premises in a comfortable condition for living.

Properly performed cosmetic repairs make it possible to save on the volume of future major repairs. For example, screeding the base of the floor and leveling the walls will at least reduce the time and effort required to prepare for major repairs, of course, provided that the renovation of the room with your own hands (photo) is carried out as conscientiously and efficiently as possible .

The next stage of repair, distribution of costs and load
Budget planning and procurement of materials are rightly considered one of the most difficult stages of redecoration. Especially if you plan to do most of the repair procedures yourself. The reason is simple - amateurs and novice craftsmen have no idea how much specific material will be required for a particular area of work.
In this case, the problem can be solved in two ways:
- Compiled list works and estimates can be shown to an experienced master, which will help calculate the flow rate based on the square footage of the room;
- Calculate consumption based on standard recommendations from manufacturers of building materials, increasing the stock of glue, plaster mixtures, wallpaper, and flooring by 10% of the calculated indicators.
In the latter case, the cost of purchasing materials will increase significantly, but ultimately, the remains of cement, dry plaster and glue can be used for cosmetic repairs of other rooms in the apartment. In addition, having a list often helps to get a bulk discount, so that there are no significant gaps in the budget for a future cosmetic renovation of a room when competent organization there should be no procurement.

Preparatory stages of renovation in a room
The first, most labor-intensive stage has always been and remains the rough stripping of the walls and ceiling. Typically, renovations in a room begin with removing pieces of furniture and fixing up front door protective awning. You can use thick plastic wrap or an old blanket. An improvised curtain will protect the rest of the apartment from noise and dust, which even with very careful work, using a vacuum cleaner and wet cleaning flooring always accumulates in a room in considerable quantities.
Before repairs, the lamps must be removed; instead of a chandelier, a socket with a light bulb is left in the room. If the room has double-glazed windows, then it would be a good idea to cover the window opening with film before the repair. It is clear that the film also covers the floor covering; it is easier to roll up the laid polyethylene than to wash the dirt in the room every evening.
Removing old finishes from walls
Preparing for a redecoration takes about a third of the planned time. During this time, you will need to remove the whitewash and wallpaper from the walls of the room. If there are areas with damaged plaster, it will take another day to knock the plaster off the walls.

Old wallpaper is removed either in one sheet or scraped off in small pieces for a long time, it all depends on the glue used. Before removing the wallpaper, moisten the surface with a small amount of water using a spray bottle. After 20-30 minutes, the trellises can be removed in patches. For especially strong adhesives, boiling water and steam are used. In any case, after stripping the old trellises, you will need to use a vacuum cleaner and a stiff brush to remove dust and glue residues.
Peeling and restoration of the ceiling surface
The ceiling is freed from the decorative coating much faster and easier than the walls. If your redecoration plans include a sticker polystyrene boards or styling plastic panels, then it will be enough to remove the top layer of whitewash.
The situation is more complicated if the ceiling in the room is painted water-based paint or whitewashed with lime. In this case, it will take at least a day to remove the durable layer of old finish.
The most common option for restoring the ceiling during cosmetic repairs involves leveling the plane of the ceiling. In any room of any apartment, the floor slabs lie with a differential of several degrees, which leads to a difference in ceiling height near the opposing walls of the room from 2 to 5 cm.
If time and budget for cosmetic repairs allow, then it is best to level the ceiling using high-quality gypsum plaster.

To do this, plastic slats are sewn onto the ceiling and the plane is tightened with a plaster mesh. Beacon slats are glued with alabaster, guided by pre-tensioned horizontal marking cords. The mesh is sewn on dowels. The total time required to completely level the ceiling in a room is 5-6 hours of work.
You can complete a complete ceiling repair in one working day. The next day you can sand, prime and paint the surface.

Cosmetic repair work to the walls of the room
During cosmetic repairs, walls are leveled and plastered only in exceptional situations, when the situation requires it, for example, the appearance of a large number of cracks or chipping of the plaster. In addition, the total area of the walls of the room, as a rule, is three times the area of the ceiling, which in itself requires a lot of time and materials.
Therefore, during cosmetic repairs, the preparation process is limited to cutting small cracks, followed by puttying and grinding the surface. Sometimes, in order to level the plane of a single wall, particularly problematic areas are sanded with an electric sander.

In addition, at this stage of the renovation work, it is easy to change the profile and configuration of the electrical wiring in the room. It is enough to drill channels in the lower part of the walls to the installation site of new electrical outlets, break through the “glasses” for the trimmers and install the sockets themselves. The corrugations with wiring laid in the channels can be rubbed with plaster or alabaster mass. All work will take a maximum of 2-3 hours. Upon completion of preparation for finishing, the surface is vacuumed and primed.
Rough floor preparation
After finishing the most labor-intensive work with preparing the ceiling and walls, you can move on to cleaning and preparing the floor. If the floors are concrete, with laminate flooring, then cosmetic repairs may be limited to re-laying the laminate slabs, with or without replacing the lining material. Most often, damaged slabs in a room are replaced, after which the coating is polished using wax mastic.
During cosmetic repairs, linoleum coverings are cut out, the base is cleaned down to concrete, primed and covered with a heat-insulating lining based on foamed polyethylene.

If the room has wooden floors, then first of all the floorboards themselves are cleaned and repaired, then the joints are hammered and hammered, after which the surface is sanded and prepared for painting.
Don't forget about garbage and dust
Any repair work, even the simplest and most superficial, is always accompanied by the formation of a large amount of debris and dust. Before repairs, you need to prepare two or three polypropylene bags into which all the garbage from the room will be collected daily. At the end of the day, after each finishing operation, the walls and floor are cleaned of crumbled crumbs and remnants of plaster, and before finishing, the walls are cleaned with a vacuum cleaner or a damp brush.
If the walls of the room are supposed to be leveled with gypsum plaster, then the amount of debris will increase five to six times. It will be necessary to think in advance and find a way to collect and remove 150-200 kg of cement-sand waste screenings from the premises. You cannot put it in the garbage chute or trash cans, you will need to order it special service for the removal of construction waste.
Cleaning redecoration operations in the room
The first step is finishing the ceilings. Typically, the repaired and sanded surface is primed and painted with light-colored acrylic paint.

If wallpaper is used in the interior of the room, the ceilings can be decorated with non-woven or vinyl wallpaper to match the future wall decoration. A common practice for decorating lamps and chandeliers is to use imitation polystyrene stucco molding and decorative ceiling plinths.
Finishing the walls in a room is considered one of the most important and at the same time time-consuming cosmetic operations. Even taking into account the fact that half the walls in the room will be covered with furniture, a certain part of the walls will still be clearly visible to everyone present in the room. If during cosmetic repairs it was not possible to properly level the surface of the walls, you can hide the imperfections only under the wallpaper. It is best to use trellises on a fabric basis or with a pronounced relief textured surface. Pasting a room will take 7-8 hours or a full working day.

Repairing doors and floors in a small room
The wooden plank floor of the old layout often has to be hidden under linoleum or laminate. In this case, the surface of the floorboards is sanded with a sanding machine, and the joints are sewn together with nails driven at an angle to the board. At the next stage of repair, the floor surface is sewn up OSB boards, after which you can lay linoleum or any other flooring option in the room.

The situation becomes more complicated if the concrete floors are leveled to the level of the screed throughout the apartment. In this case, any floor covering in the room will lead to the appearance of a threshold, so the installation of laminate or parquet must be planned simultaneously in all rooms.
The final stage is the restoration of interior doors. The hatch and the door itself, if they are in good condition, can not be changed, but undergo restoration with cleaning and polishing of the surface. External cladding door frame during repairs they are traditionally replaced with a new one. The replacement of doors with a supporting frame is planned for a major overhaul, usually so that the entire apartment or house has doors of the same style and design.

Conclusion
Renovating a room, even in a cosmetic form, requires careful preparation, first of all, in the details of the future interior of the room, the method of decorating the walls and floor. Any attempts to postpone the decision to the future, to do it at random, as it turns out, will lead to a significant increase in costs and an increase in the time required to restore the room by two to three times.